Configuration
Locating the Extend Module
Once the module has been successfully installed and enabled, you will need to complete the required admin configuration to begin offering protection plans in your store.
Login to your Magento Admin panel, navigate to Stores, and select Configuration:

In the Configuration menu, select Extend > Extend Protection Plans to navigate to the module configuration menu.
Setting up Your Extend Account

If you do not yet have an Extend account, the module’s configuration page can help connect you with the correct team to get your account provisioned and guide you through the onboarding process. If you need help setting up your Extend account or have questions about the process, reach out to [email protected].
Set up Extend Account from Magento
To get started with Extend, you’ll need an account. To create an Extend account and access your StoreId and Extend Access Token, simply select ‘Set up my Extend account’. This will redirect you to the Extend Merchant Portal sign up page. This page can also be accessed here.
On the sign up page, you will select your e-Commerce platform (Magento), and go through the steps to create your account. You will have the option of creating either a Sandbox account (for your staging server) or a Production account on our production environment for your live store.
Configure with Existing Account
If you or your Extend Onboarding Team have already created an Extend Production or Sandbox store, you will not need to set up an account. Please proceed with setting up the module in Magento.
For more information regarding the creation of Extend Accounts, please coordinate with your Extend Onboarding Team.
Module Configuration
The general configuration menu is where you enable the Extend Module and select the individual features you would like to leverage in your store.
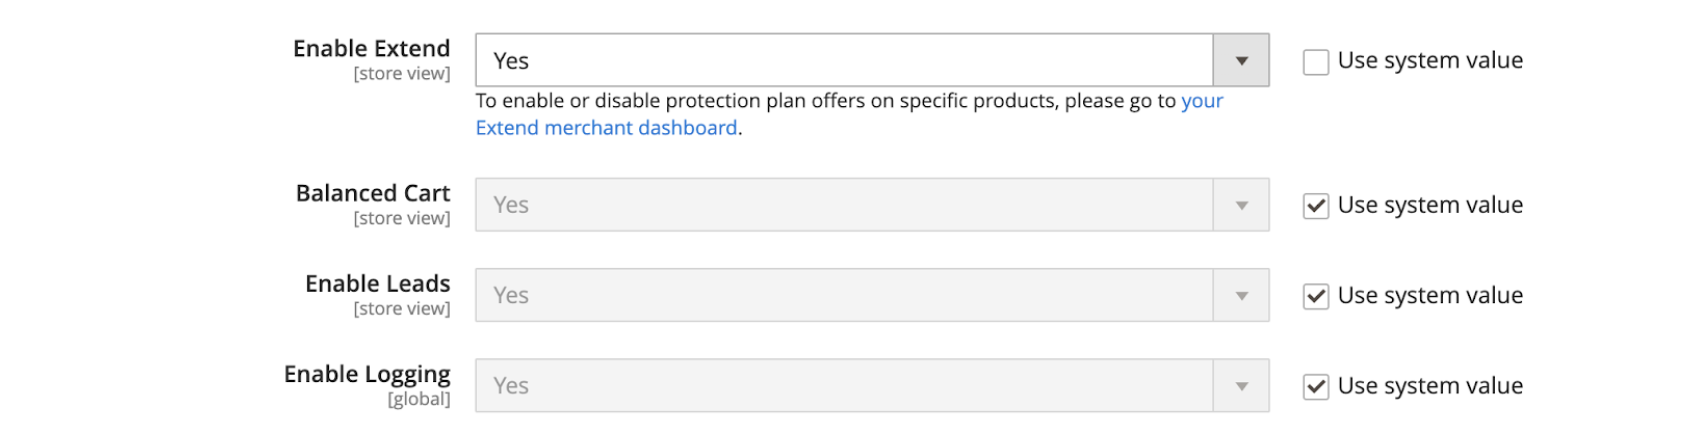
Enable Extend
This setting enables the module in Magento to display protection plan offers and create service contracts.
Balanced Cart
This setting enables the module to automatically handle cart balancing for warranty orders. As a best practice, if a customer increases or decreases the quantity of products, the quantity for the related plans in the cart should increase or decrease as well. In addition, if a customer completely removes a product from the cart, any related plans should be removed from the cart as well so the customer does not accidentally purchase a protection plan without a product. We recommend setting this to ‘Yes’.
Enable Leads
If enabled, the extension will automatically create leads for users who purchase a warrantable product without an associated warranty.
When an ordered item product is warrantable but has no related warranties in order, Extend creates a Lead and can let the Customer know via email that he or she is able to add a warranty for the purchased item separately.
Enable Logging
Enables logging for the module. This setting controls whether module specific errors, warnings, and debugs are recorded on the server.
Authentication
Configure Authentication settings to communicate with the Extend Store. The store can be connected to either your Extend Sandbox or Production store by configuring the ‘Mode’ setting accordingly.
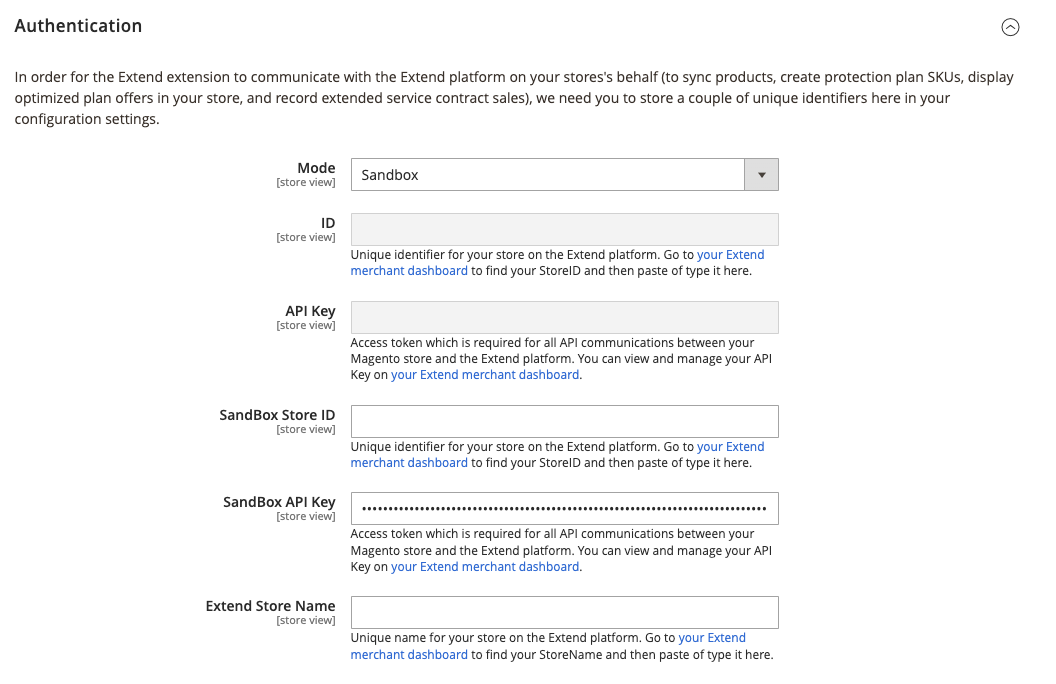
Authentication Modes
Live: If the mode selected is Live, it is required to enter your Extend Production store ID and Production store API Key. These values are unique identifiers for your Production store on the Extend Platform.
Sandbox: If the mode selected is Sandbox, it is required to enter your Extend Sandbox Store ID and Sandbox store API Key. These values are unique identifiers for your Sandbox store on the Extend Platform.
Contracts
For additional information on these configuration settings, see the Contract Management section.
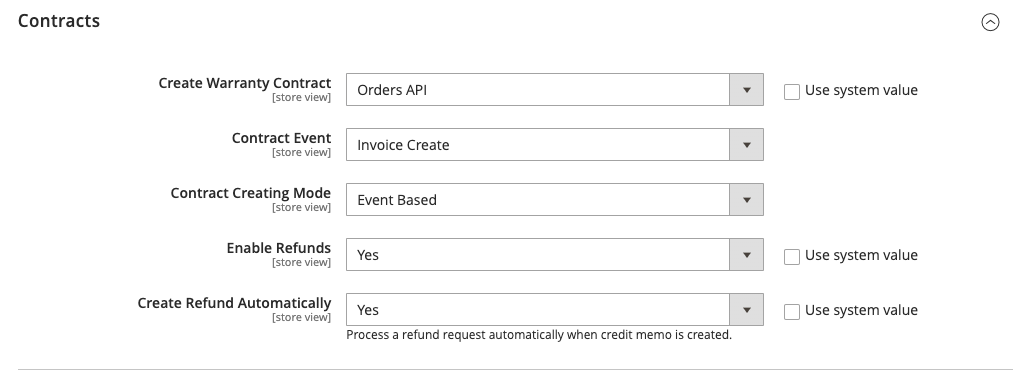
Create Warranty Contract
This setting determines whether to use Extend's Contracts API or Orders API. We recommend setting this to 'Orders API' to ensure your integration is making use of the Extend platform's latest functionality.
Contract Event
Determines the event used to create the warranty contract. Available values are 'Order Create', 'Invoice Create' and 'Shipment Create.' Your Extend Onboarding Team can ensure your integration is set up to the appropriate Contract Event. If you have questions about setting this value, contact [email protected].
Contract Creating Mode
Determines whether the contract is created based on an event in Magento or on a scheduled basis utilizing a server Cron job.
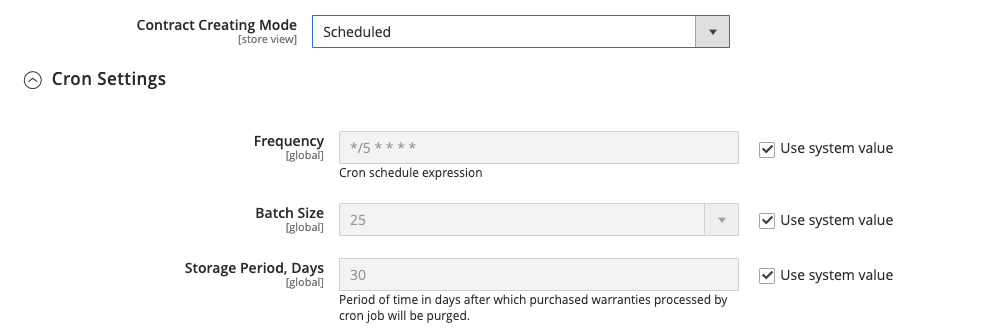
If the value is set to Scheduled additional options will appear for scheduling the Cron.
Enable Refunds
This setting determines whether a contract can be cancelled from within the Magento environment.
Create Refund Automatically
If enabled, the extension will process a refund request automatically when a credit memo is created.
Offers
For additional information on these configuration settings, see the Offer Presentation section.
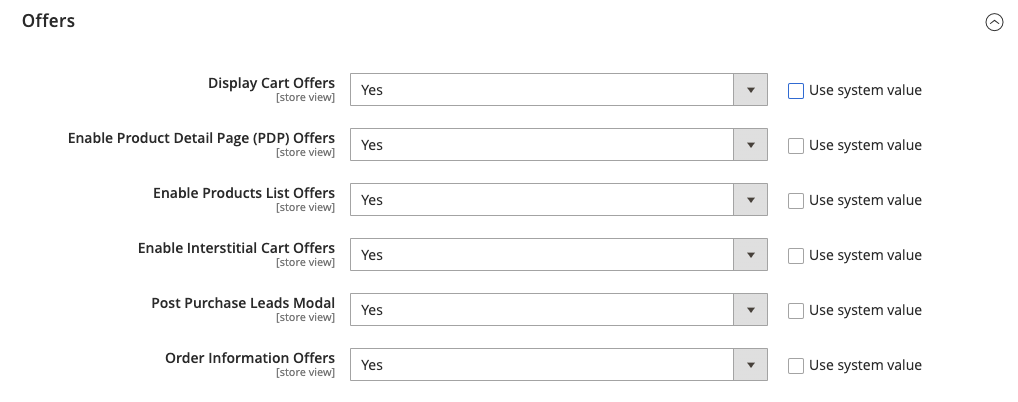
Display Cart Offers
This setting enables the presentation of offers (for warrantable and mapped products) directly in the shopping cart. For more information, please see the section on Offer Presentation. We recommend setting this to ‘Yes’.
Enable Products List Offers
This setting enables whether offers are presented when a user clicks add to cart from a catalog or product list page in Magento. We recommend setting this to ‘Yes’.
Enable Interstitial Cart Offers
This setting enables whether cart offers appear in the Interstitial or "Pop-Out" cart in Magento. We recommend setting this to ‘Yes’.
Post Purchase Leads Modal
This setting enables the presentation of the Aftermarket Post-Purchase Modal if a leadToken is presented as a parameter in the user's URL. For more information about Extend's post-purchase solution, see Managing your Leads with PUE.
Order Information Offers
This setting enables whether offers appear when a user navigates to the list of their Orders. Note that this setting also requires the Leads feature to also be enabled.
Save Changes & Clear Cache
Completed configuration changes are saved via the ‘Save Config’ button in the upper right hand corner of the Extend Module configuration menu.
You should see the following success banners on save of the Configuration:

Once the configuration is saved, you will need to clear the Magento cache. To do this, in the Magento admin panel, navigate to Settings > Cache Management. From here, select ‘Flush Magento Cache’.

Your environment is now ready to begin offering Extend Protection Plans!
Advanced Configuration
Additional configuration for your store is available on the Extend Merchant Dashboard. From the Extend Merchant Dashboard, you can customize the look and feel of your offers, add your company logo for customer emails, toggle status of offers, and more.
Visit your merchant portal or coordinate with your Merchant Onboarding Manager for more information.
Note: This button will direct you to the merchant dashboard associated with your Production store. You can find the dashboard associated with your Demo/Sandbox store here.
Updated 12 days ago