Extend Protection Plugin For WooCommerce
This page will walk you through the steps to download and install the Extend for WooCommerce plugin.
The Extend Protection For WooCommerce provides the ability for merchants to sell both Product and Shipping Protection plans to their customers.
Before proceeding with the steps, please make sure you have an Extend Store account and have installed the WooCommerce plugin in your store.
Installing Extend for WooCommerce plugin
Do not install the plugin on a production environment without having installed it in a test environment first and performing thorough testing.
To install the plugin, you will need to download it as a zip file from GitHub and upload it to the WooCommerce store.
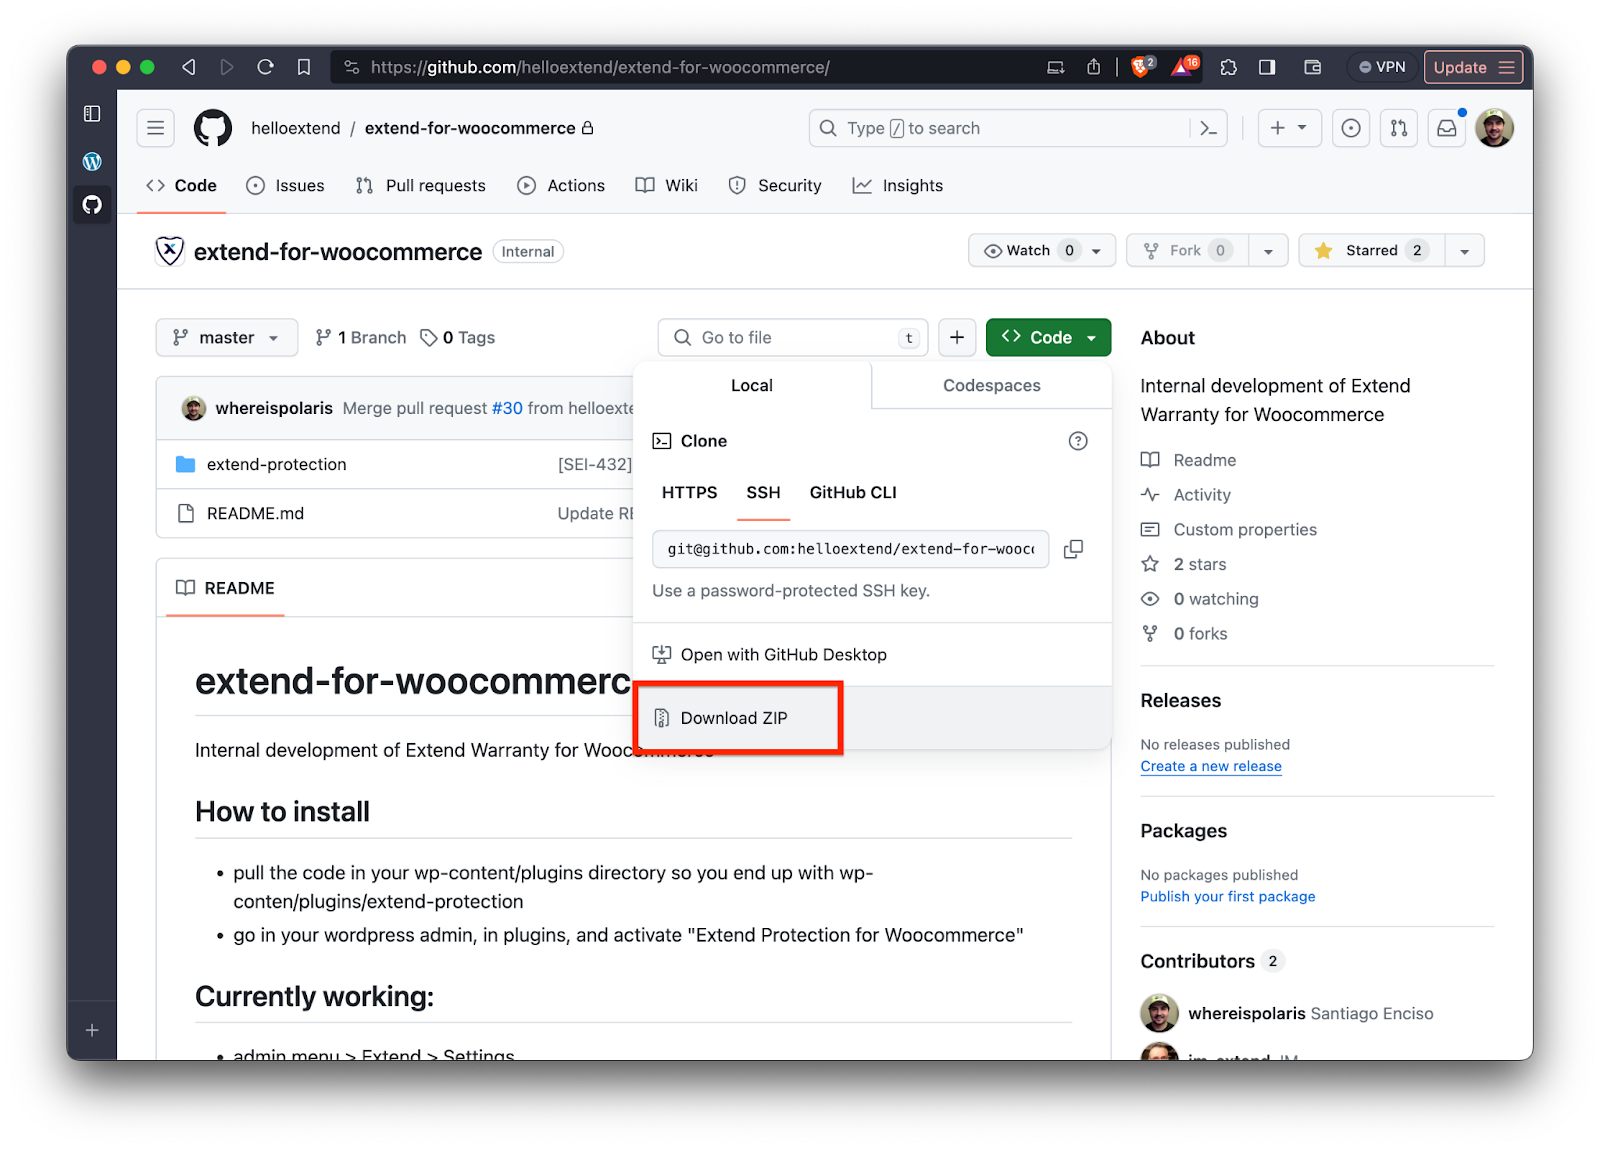
- Go to https://github.com/helloextend/extend-for-woocommerce/
- Click on the Code button
- Select Download Zip
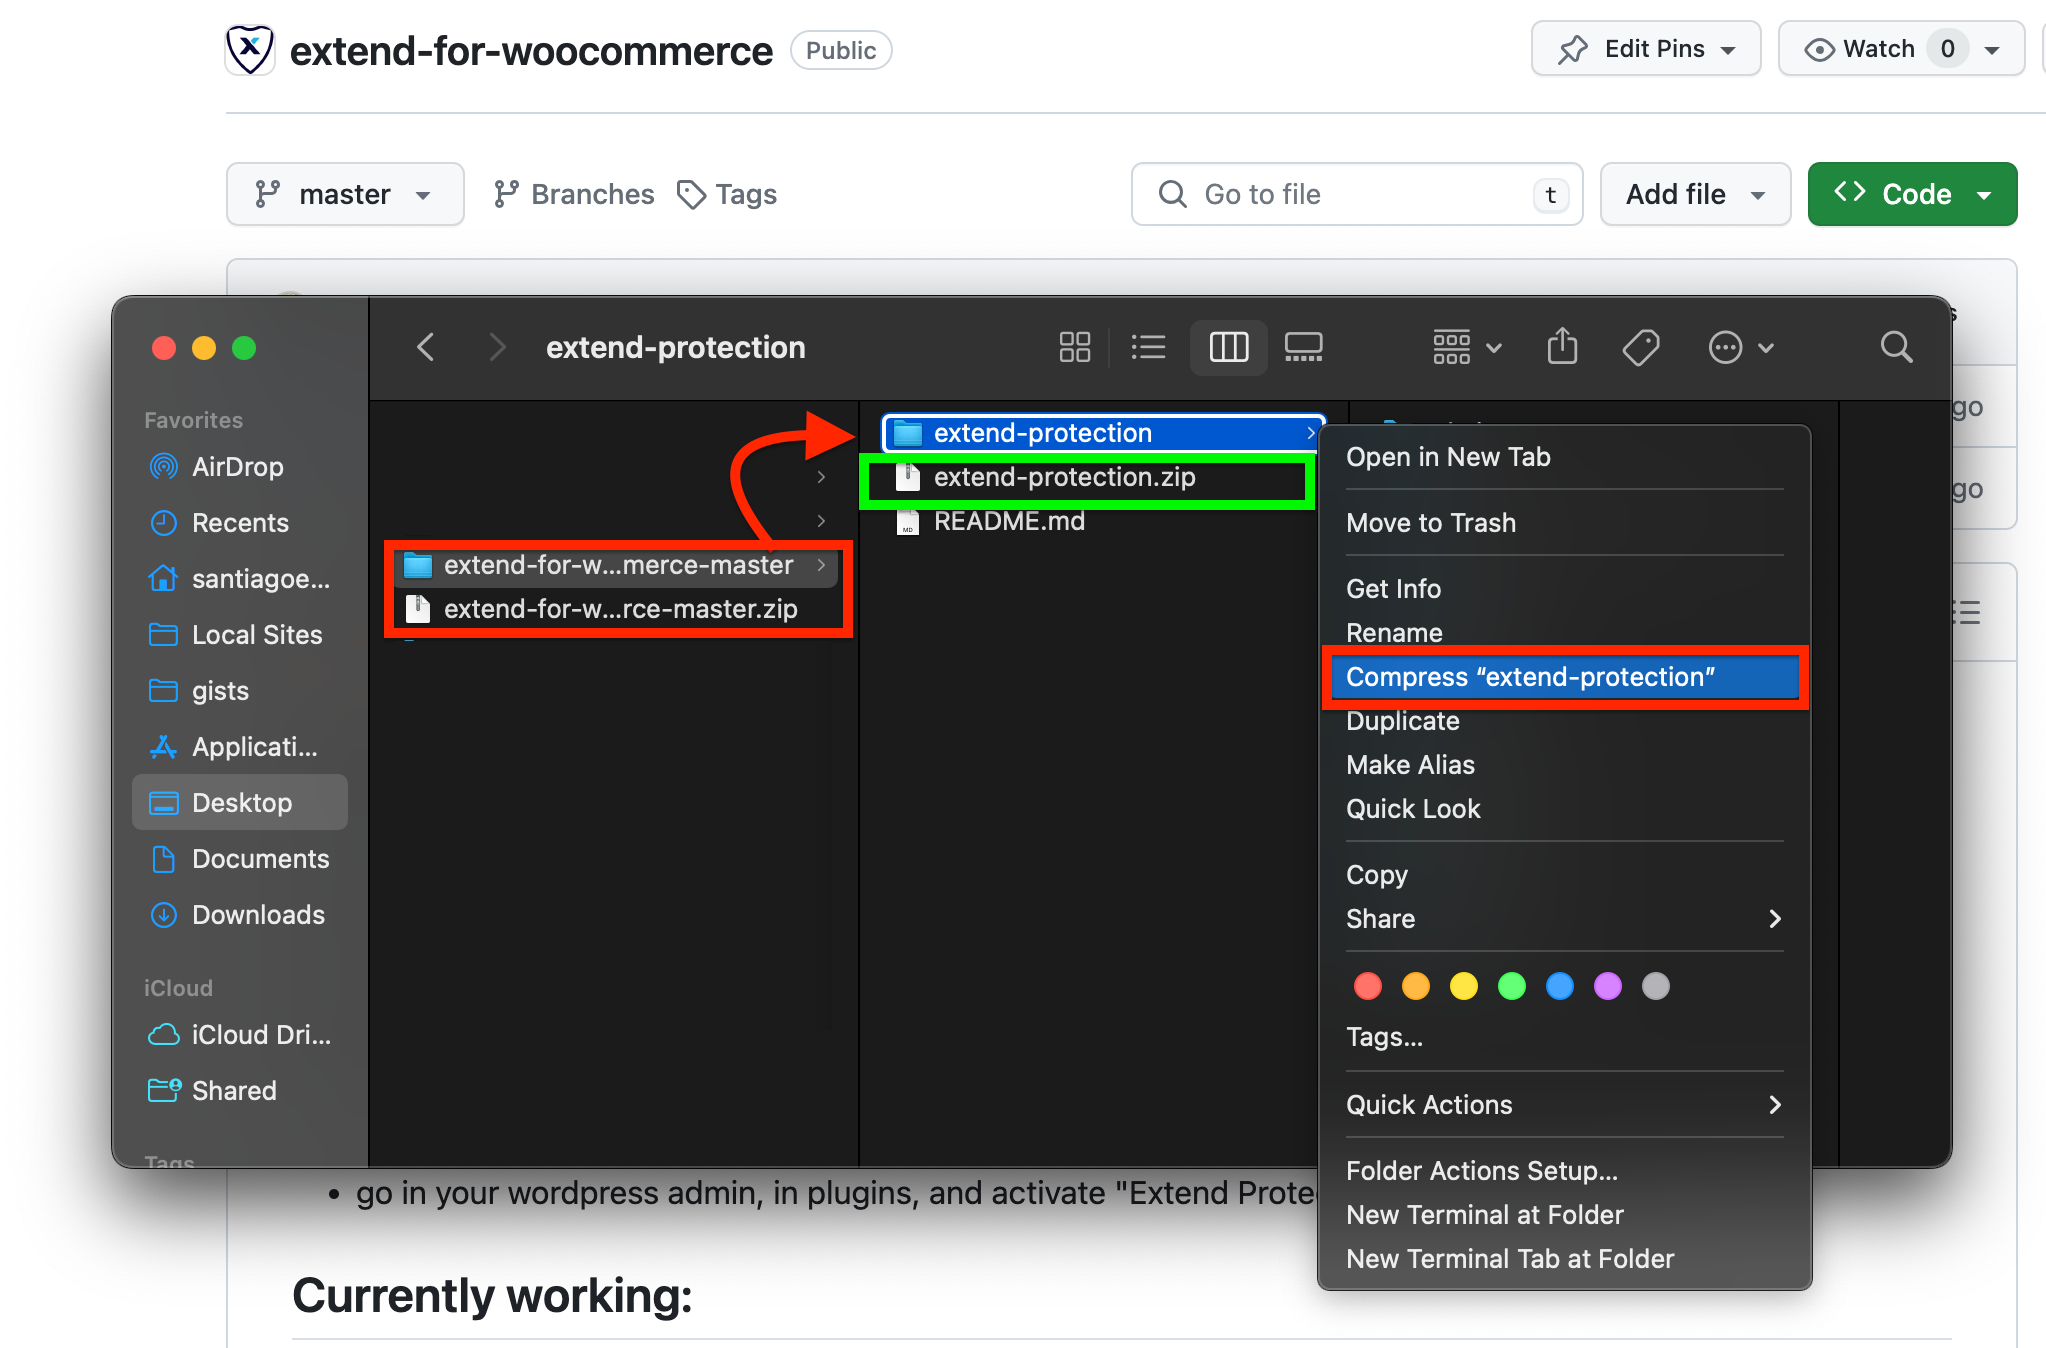
The zip file that gets downloaded is called extend-for-woocommerce-master.zip. You will need to unzip this file and open the folder extend-for-woocommerce-master/. Once the folder is unzipped, you will then need to zip up the folder called extend-for-woocommerce/. extend-for-woocommerce.zip is the file you will upload to your WordPress site.
- Go to the WordPress Dashboard (wp-admin) > Plugins > Add New Plugin > Upload Plugin
- Choose the extend-for-woocommerce.zip file and click Install Now
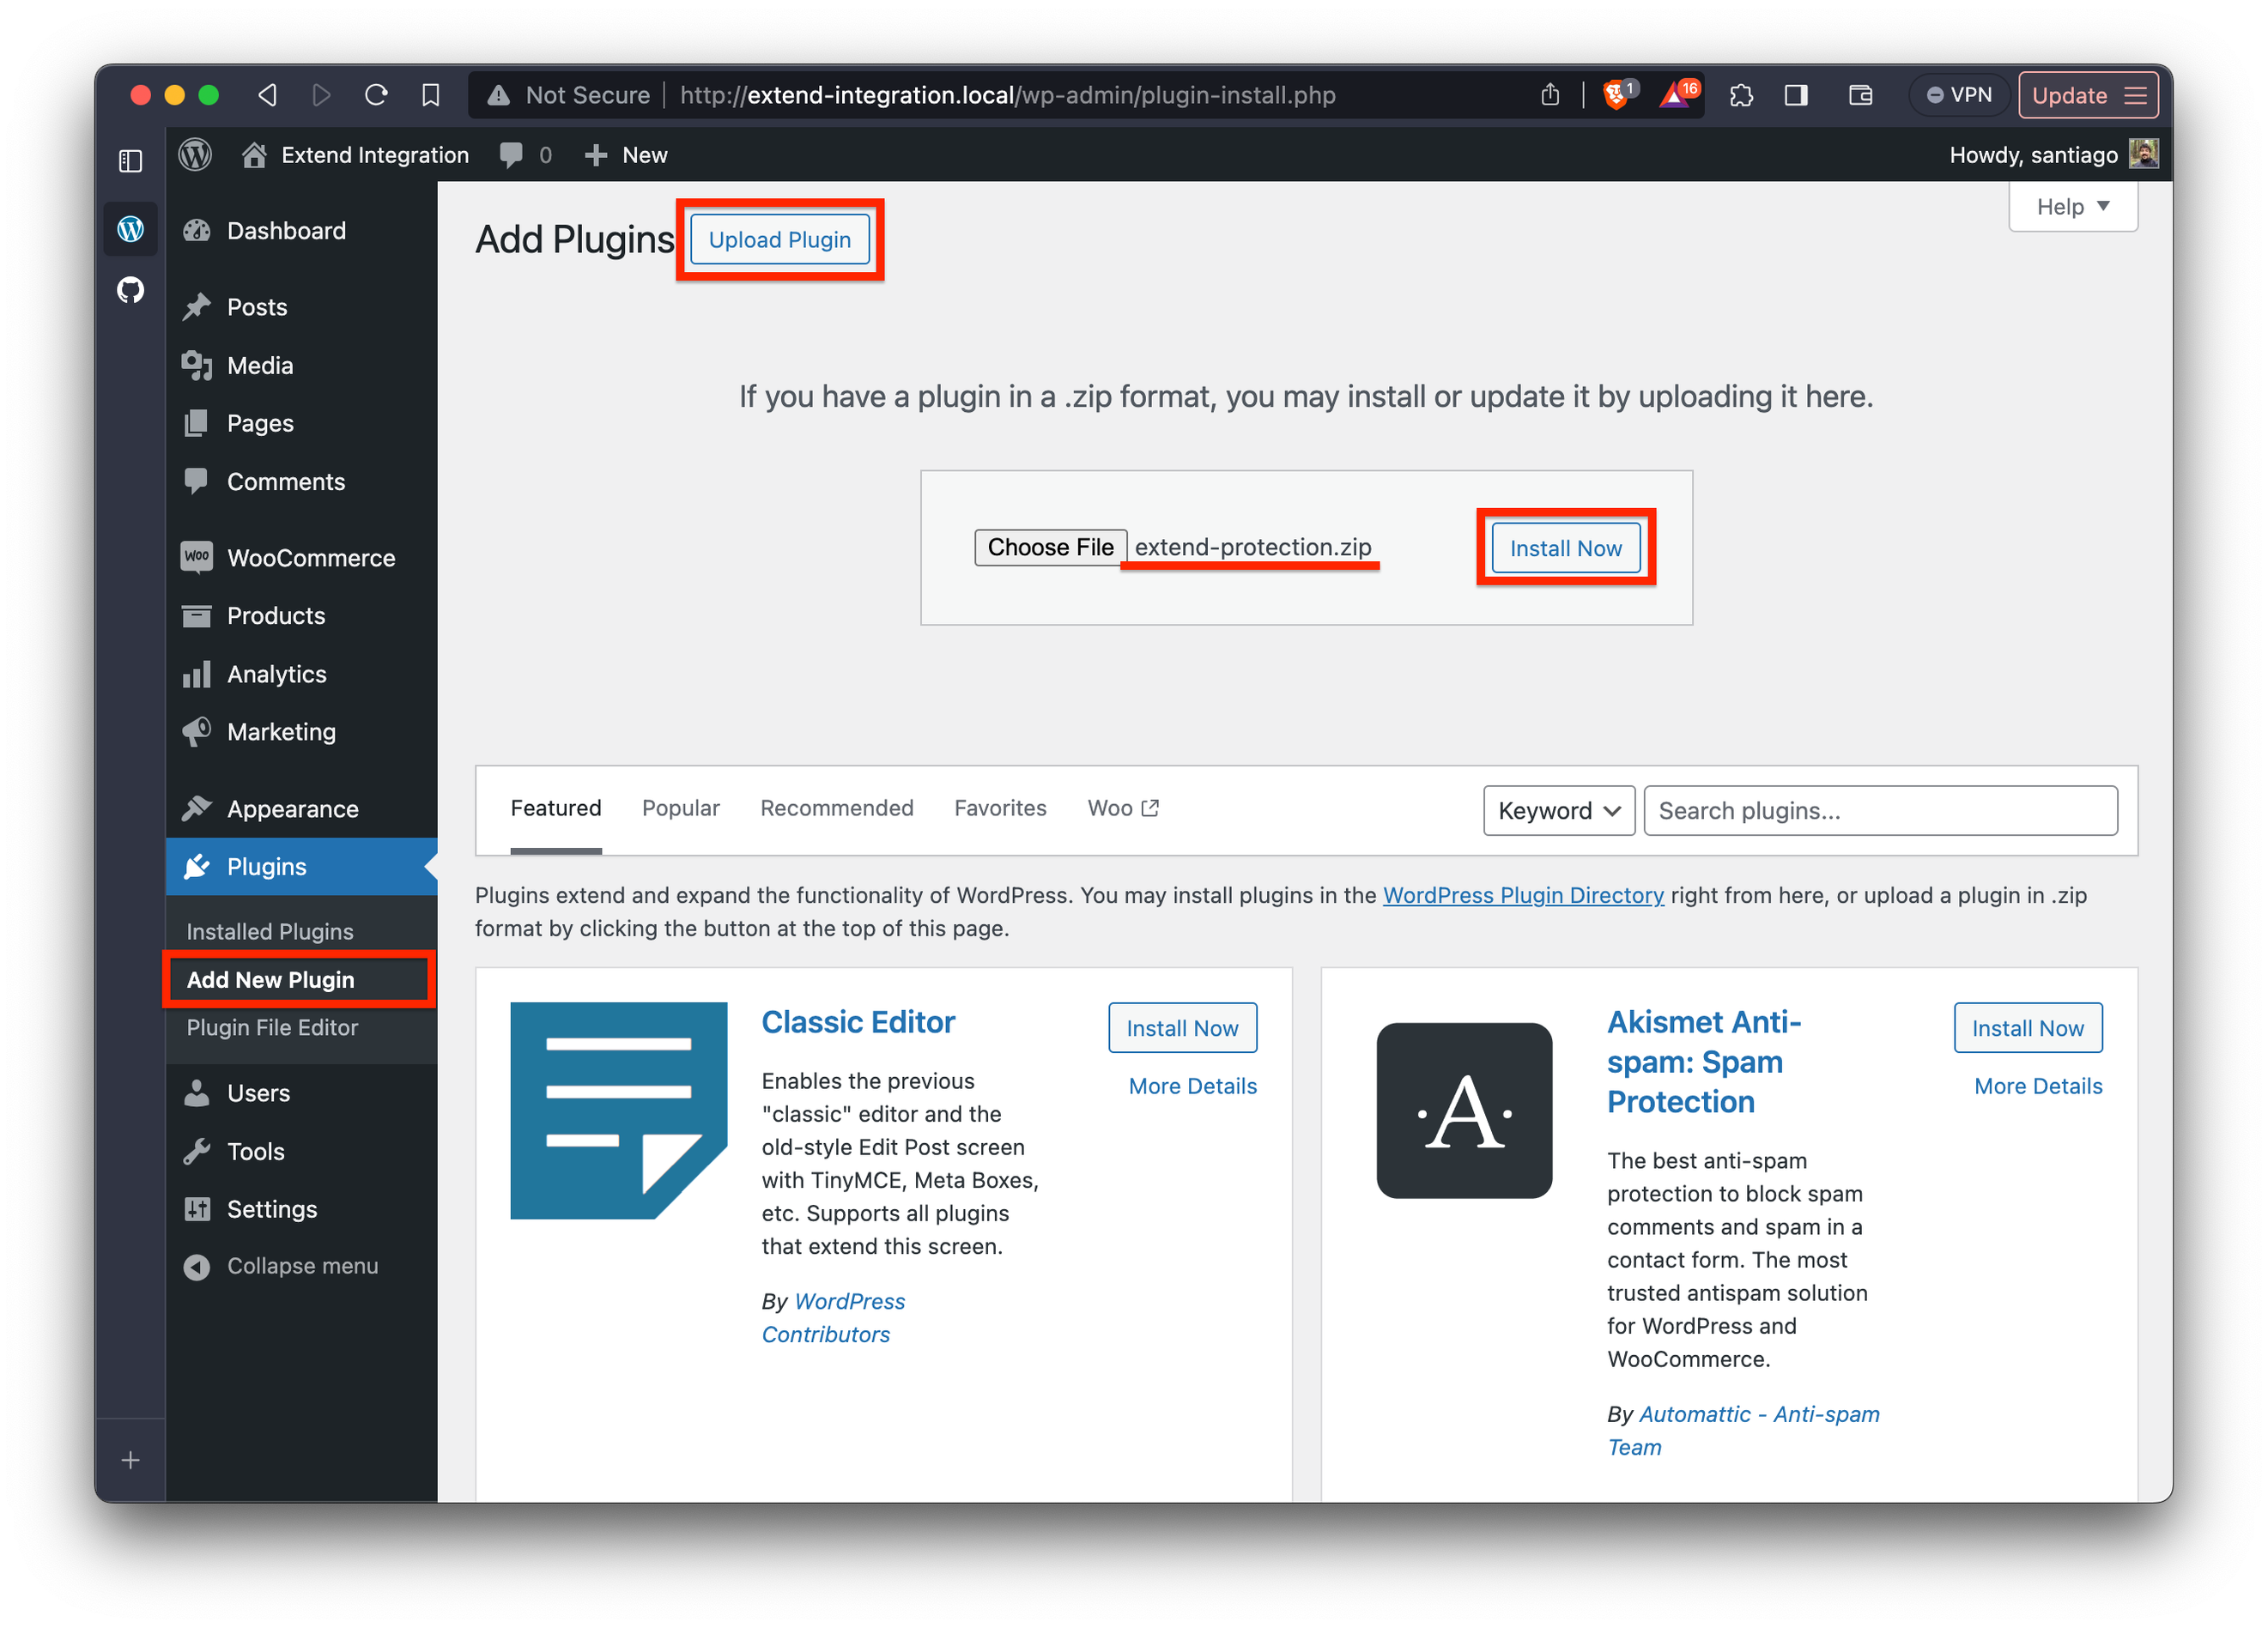
- Click Activate
You should know see the WooCommerce plugin activated successfully.https://merchants.extend.com/).
You may encounter issues within your activation process, if you do please refer to Current Limitations & Known Issues section below.
Configuring Plugin settings
Once the plugin is installed and activated successfully, you will see the Extend tab in the WordPress Dashboard. Click on the tab to begin the configuration.
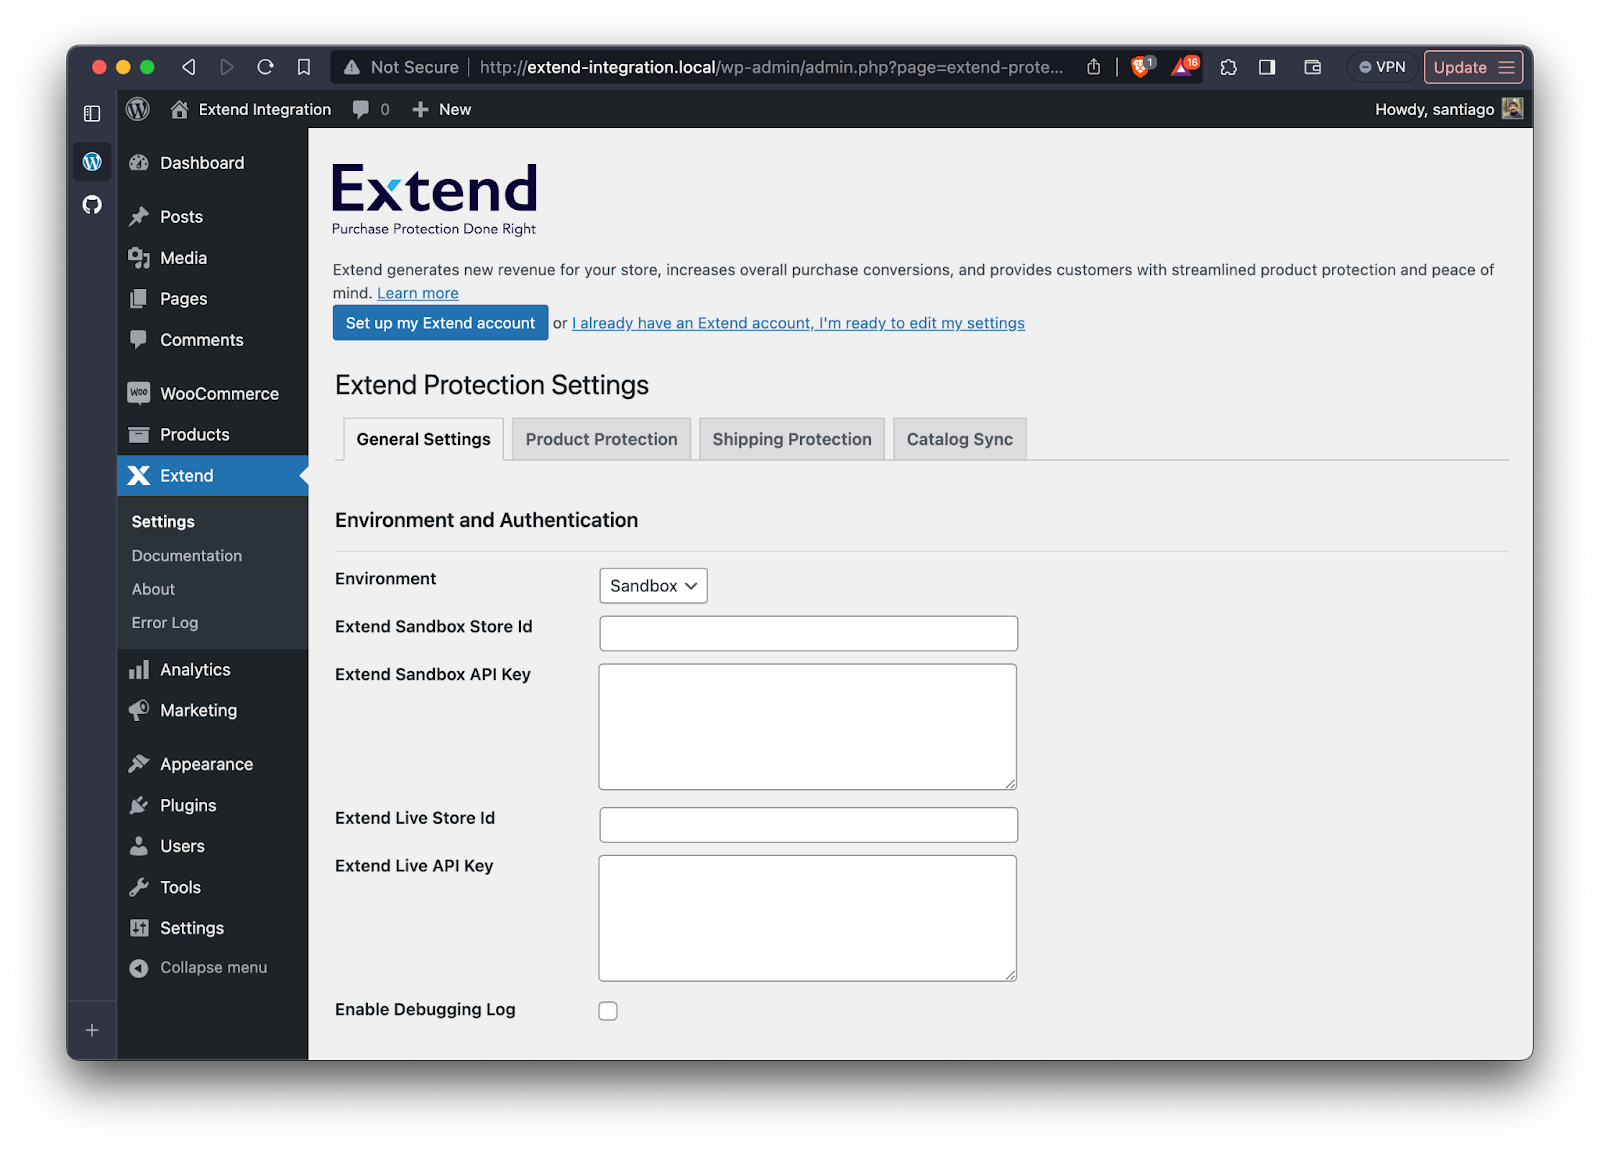
General Settings Tab
In the General Settings tab, If you are working on a demo store (http://merchants.demo.extend.com) select the Sandbox environment and add the credentials to the Sandbox fields. Otherwise, if this is a production store (http://merchants.extend.com), you can select Live and add the Store ID
The Enable Debug Log setting is a very helpful tool that will provide some information when certain events happen (contract creation, SP quotes, catalog sync, and much more). If you are running into some issues with the plugin, the first step is to enable the log and go to the Error Log tab, located under the Extend tab in wp-admin.
Product Protection Tab
This tab will have all the settings to enable Product Protection. Some of these settings are obvious in what they do, but let’s review them and provide more information.
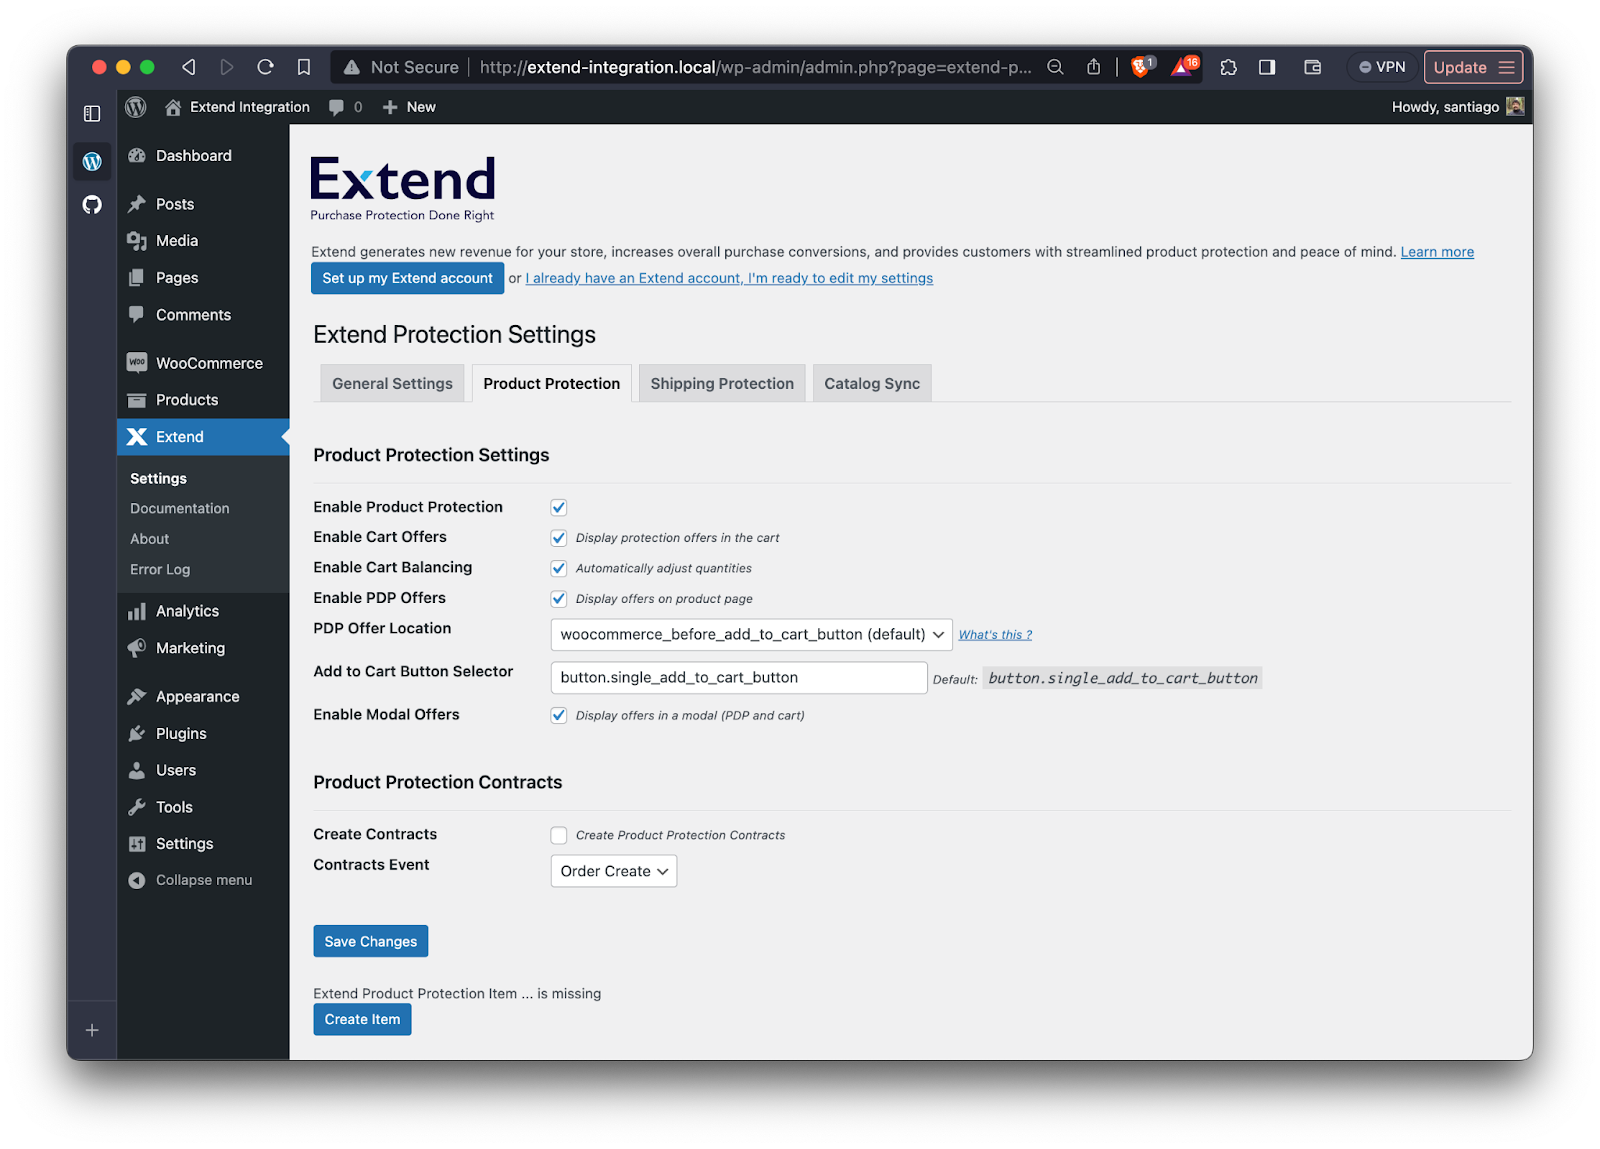
- Enable Product Protection: Must be enabled for all the other settings to work.
- Enable Cart Offers: Will enable cart offers in the /cart page
- Enable Cart Balancing: Enables cart normalization
- Enable PDP Offers: Adds PDP offers to the product display page
- PDP offer location: This selects the WooCommerce Hook in the PDP where you want the offers to show
- Add to Cart Button Selector: This is the CSS selector of the ATC button. Inspect the ATC button and find the best selector to add.
- Enable Modal Offers: Sets the offer modal to true
- Create Contracts: This must be enabled for the contracts to be created.
- Contract Event: Allows merchants to create contracts when the order is placed, or when the order is marked as ‘Completed’ in WooCommerce
- Create Item button: If there is no Extend SKU in the catalog, you will not be able to add a Product Protection line item to the cart. You can create this SKU by clicking on this button.
Shipping Protection Tab
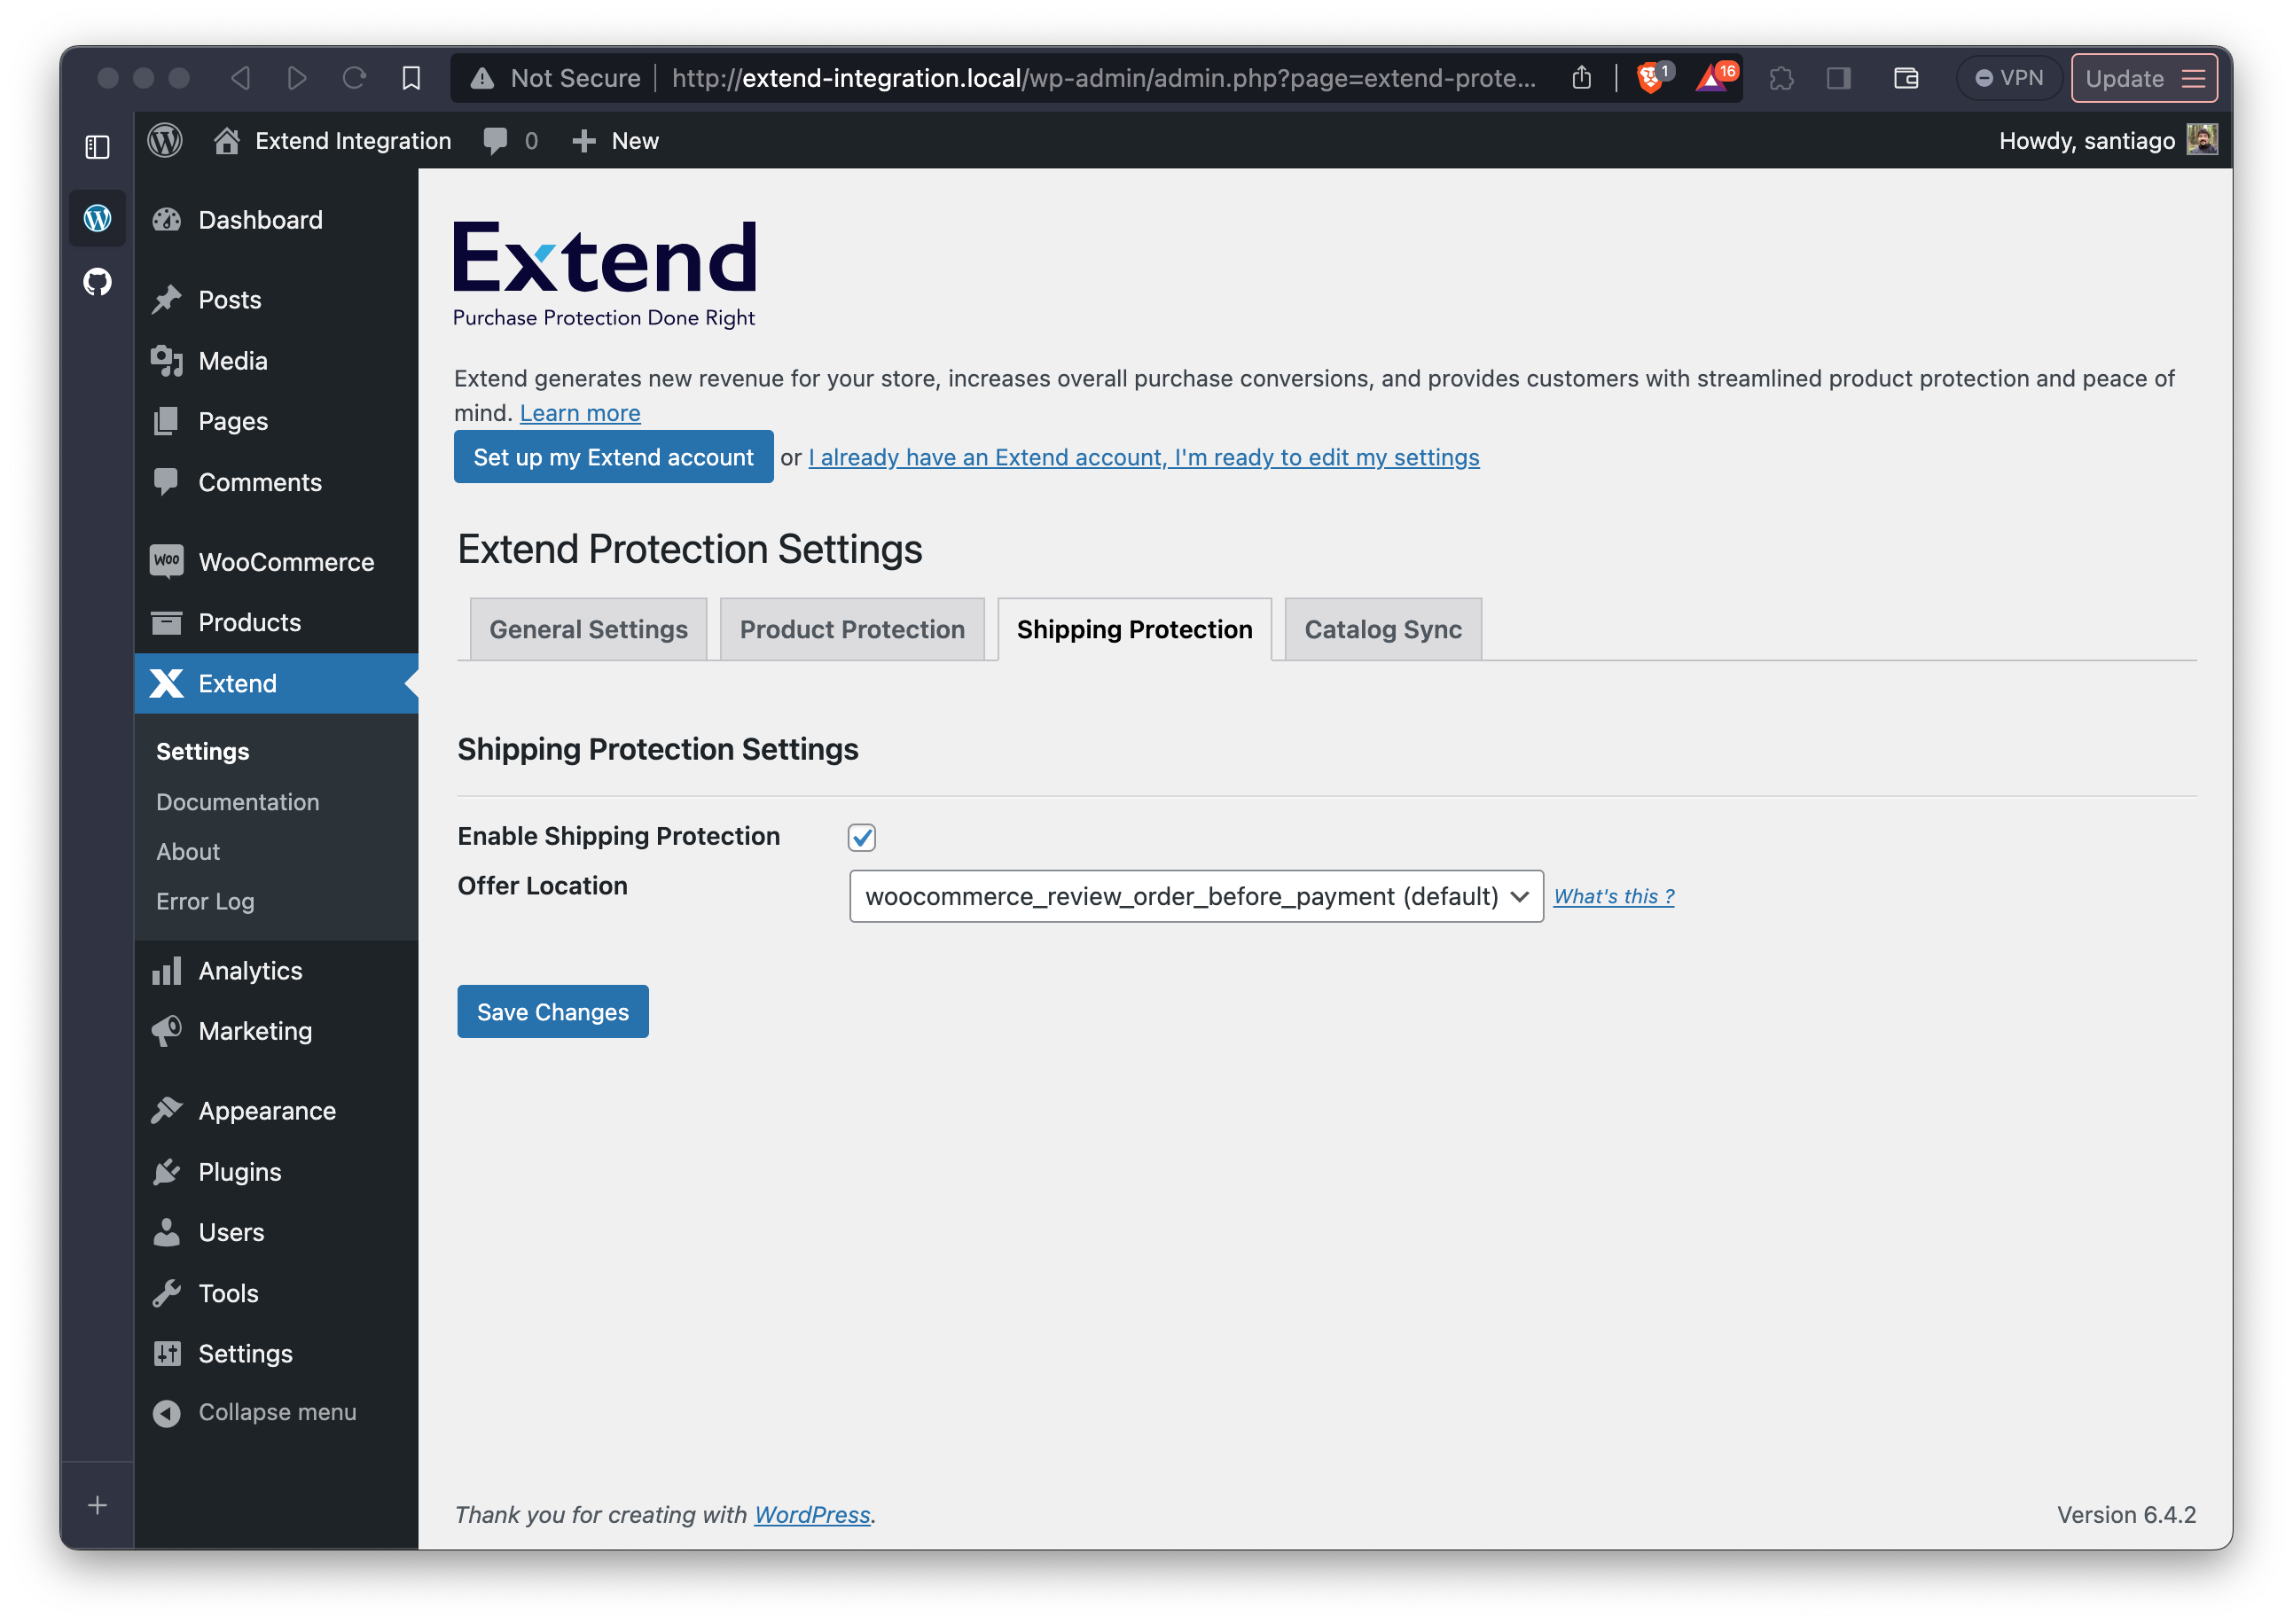
The Shipping Protection tab only has two settings, one to enable it and the other one to select the hook where you want the offer to show up on the /checkout/ page.
If your theme is not using any of the hooks listed in the dropdown, select Other and hit save. This will then display a field where you can add a custom hook.
Catalog Sync Tab
For your products to be mapped to protection plans, you'll need to run a product catalog sync.
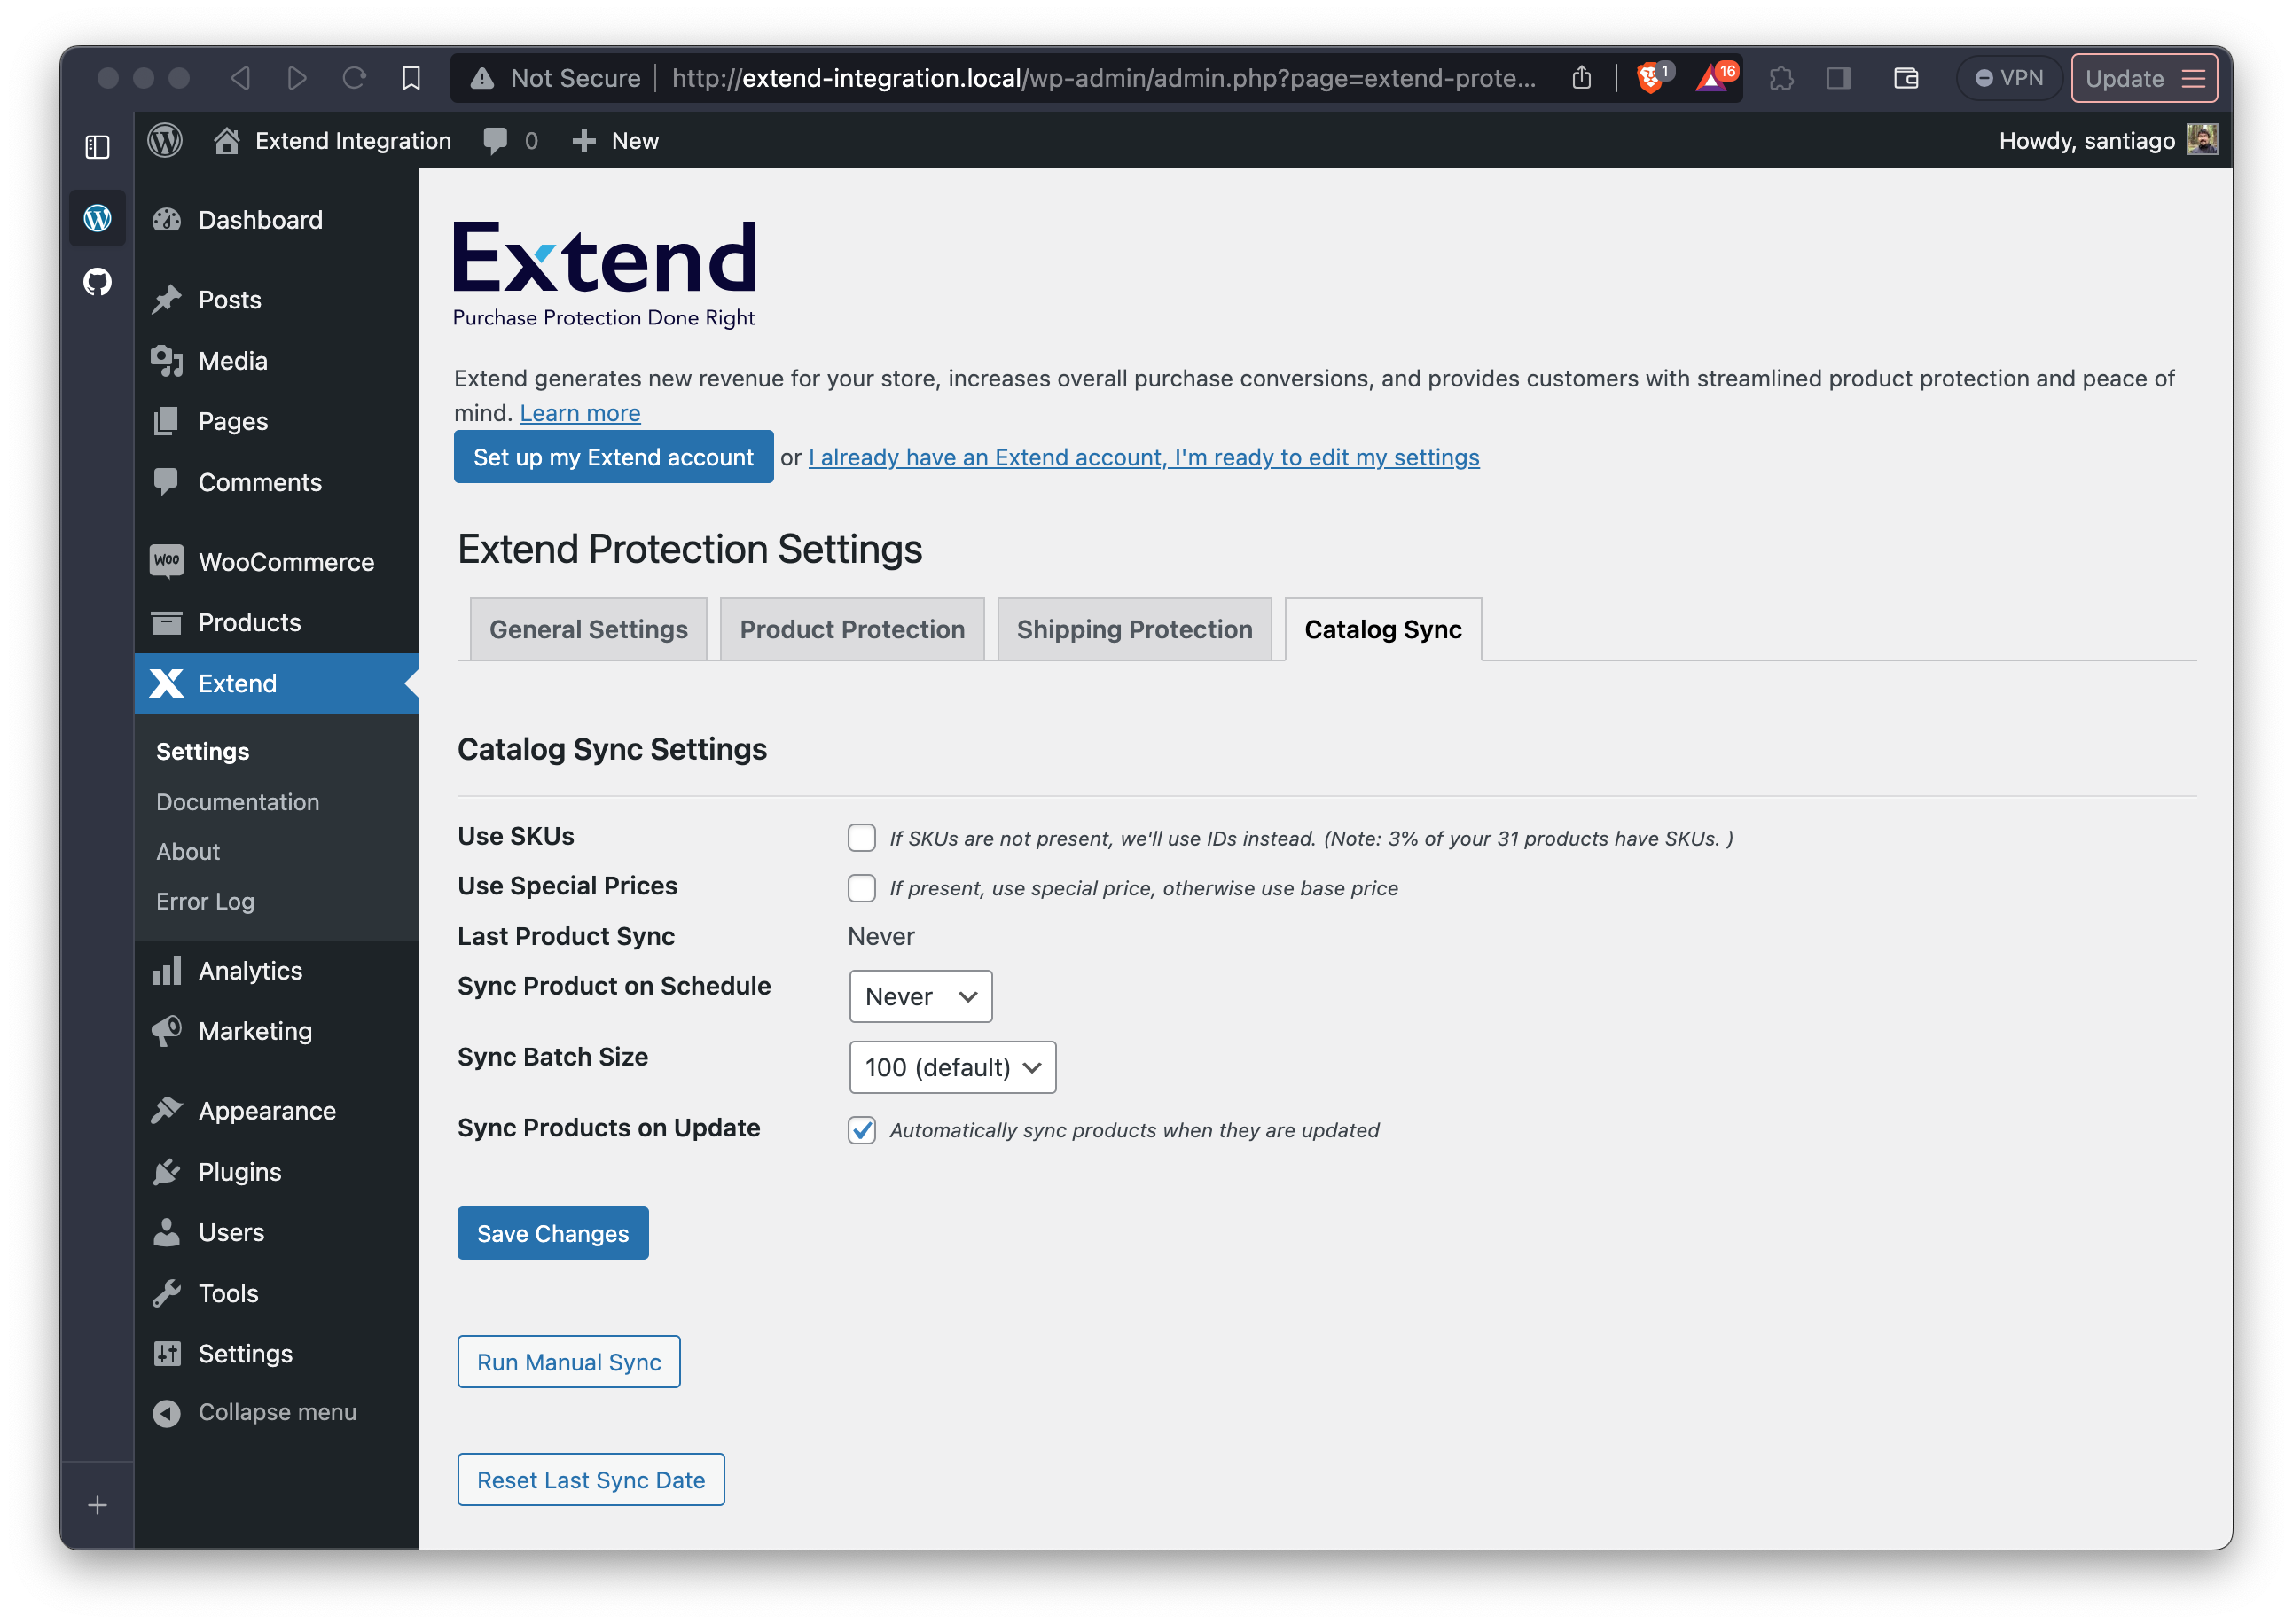
- Use SKUs: This setting will use the product SKUs as the referenceIds in Extend.
- SKUs are optional in WooCommerce, so you will need to make sure all products have the SKUs to enable this setting.
- At the moment this setting is not working correctly with Product Protection. We will update the documentation once this is resolved.
- Use Special Prices: Will use special prices when selected
- Last Product Sync: Will provide a date of the last catalog sync
- Sync Product on Schedule: Will create a cron job to scan for any new products and run a sync.
- Sync Batch Size: Breaks down the sync in bigger or smaller batches. Larger batches will take longer to sync.
- Sync Products on Update: Will do a single product sync when a user edits a product and clicks the ‘Update’ button.
- Run Manual Sync: Will trigger a sync immediately
- Reset Last Sync Date: Clears the Last Product Sync date
If you run a sync and do not see any products in the Extend catalog, you can go to the Error Log tab to see if there were any errors during the sync. Make sure the Enable Debug Log is checked in the General Settings tab.
Current Limitations & Known Issues
- The plugin has been tested on
- PHP 7.4 and 8
- WordPress 6.x
- WooCommerce 7.x
- Known issues
- Issue #32: The Enable Product Protection setting in the Product Protection settings must be selected in order for Shipping Protection to work.
- Issue #33 The Catalog Sync feature can only do 500 products at the moment.
- Issue #34 Enable SKUs feature in the catalog sync is not working properly. For now, please leave that unchecked so the sync uses the WooCommerce Product IDs as the referenceId .
If you find yourself stuck or have additional questions, please submit an issue request in the project repo: https://github.com/helloextend/extend-for-woocommerce/issues
Updated 4 months ago