Offer Styling
Customize the look and feel of the product protection offer surfaces that your customers interact with on your website.
Overview
Customize the look and feel of Extend offers as they appear to customers on your website. This document will explain how you can go about creating and managing new themes to enhance the user experience.
Extend SDKsLeverage the Extend SDKs to style offers within the Merchant Portal user interface.
Table of Contents
- Overview
- New Customization Options
- Understanding Themes
- How to Access the Theme Customizer
- Feature layout and interface
- Theme Creation
- Theme Modification
- Theme Publishing
- Theme Renaming and Deletion
Customization options
Prior to the release of Enhanced Offer Styling, merchants were already able to customize the integration by choosing a logo image and a primary color by making selections in the Customize page of the merchant portal. Additionally, merchants are now able to modify the following aspects of the Extend integration’s appearance on their sites:
- Background color
- Font Family
- Primary Font Color
- Button Color
- Button Font Color
- Button Corner Radius
Understanding “themes”
In order to give merchants greater flexibility when it comes to integration appearance customization, Extend has introduced the concept of creating “themes.” A theme is a collection of customization settings (colors, fonts, logo, etc.) that can be saved, modified and published; as opposed to only being able to make those changes once, to the live site.
This approach allows merchants to develop and preview different themes without publishing every minor change to the website, as well as the ability to prepare new Extend themes in advance of design changes to the website, in addition to other benefits.
How to access the Theme Customization feature
Merchants can manage their themes and customizations from the Customize page of the merchant portal - the same place logo and primary color have historically been managed.
Feature layout and interface
The theme customization feature comprises two pages in the merchant portal: the theme customization page itself (mainly used to modify and preview new and existing themes) and the theme management page (used to manage the collection of themes a given store has created).
Theme customization page
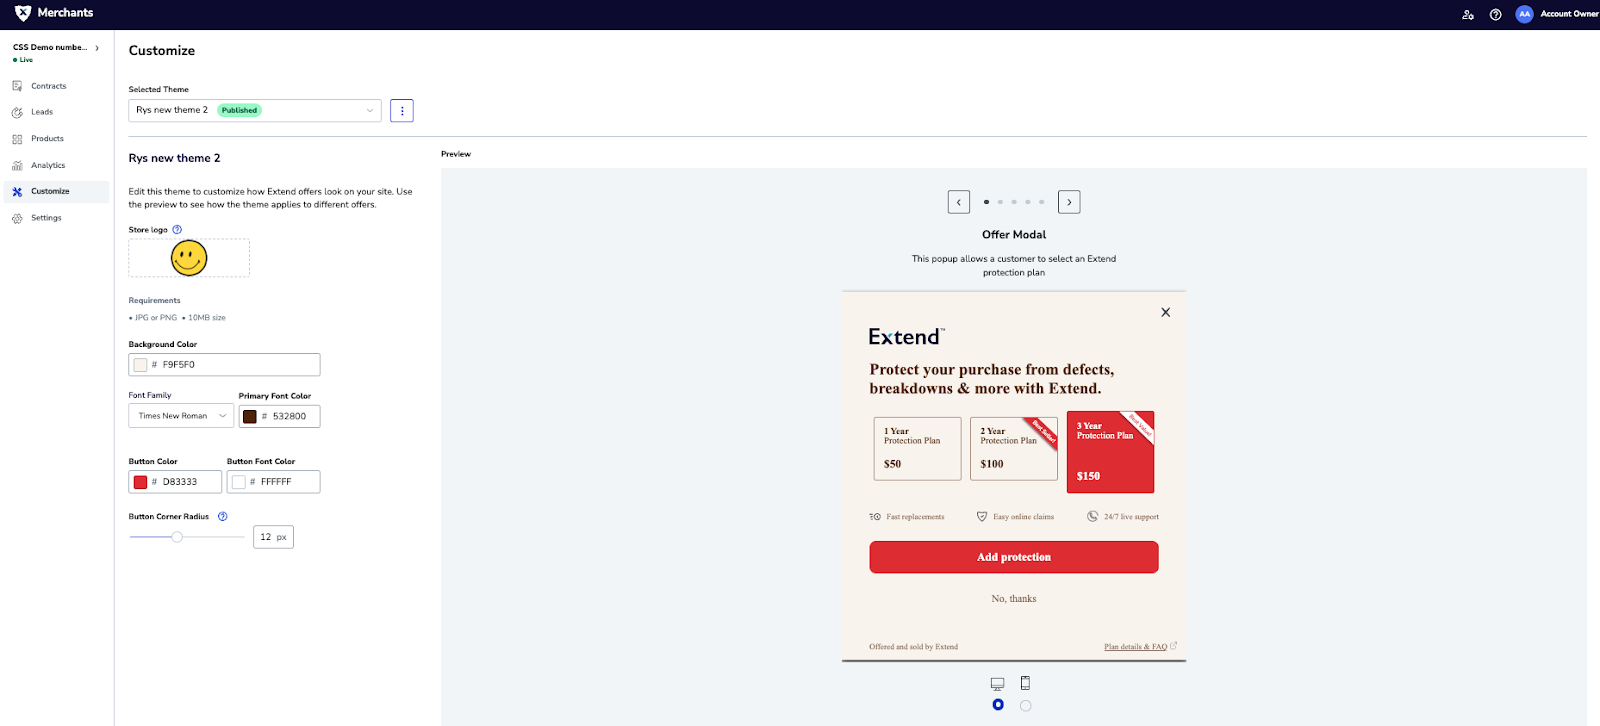
At the top of this page is the “Selected Theme” dropdown menu:
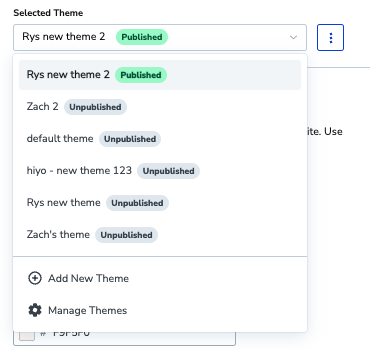
This allows merchants to switch between existing themes, as well as add new ones and navigate to the theme management page. The button to the right of the dropdown menu with three dots, provides some extra features.
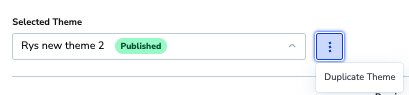
When the published theme (as indicated by the green “Published” icon) is selected (i.e., on the page), this button allows the user to duplicate the published theme, creating a new one.
When an unpublished theme is selected, as indicated by that icon, this button allows the user to either publish or rename that theme.
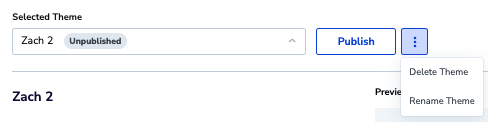
Additionally, for an unpublished theme, a “Publish” button is available to do just that: update the integration and make the theme’s customization settings live.
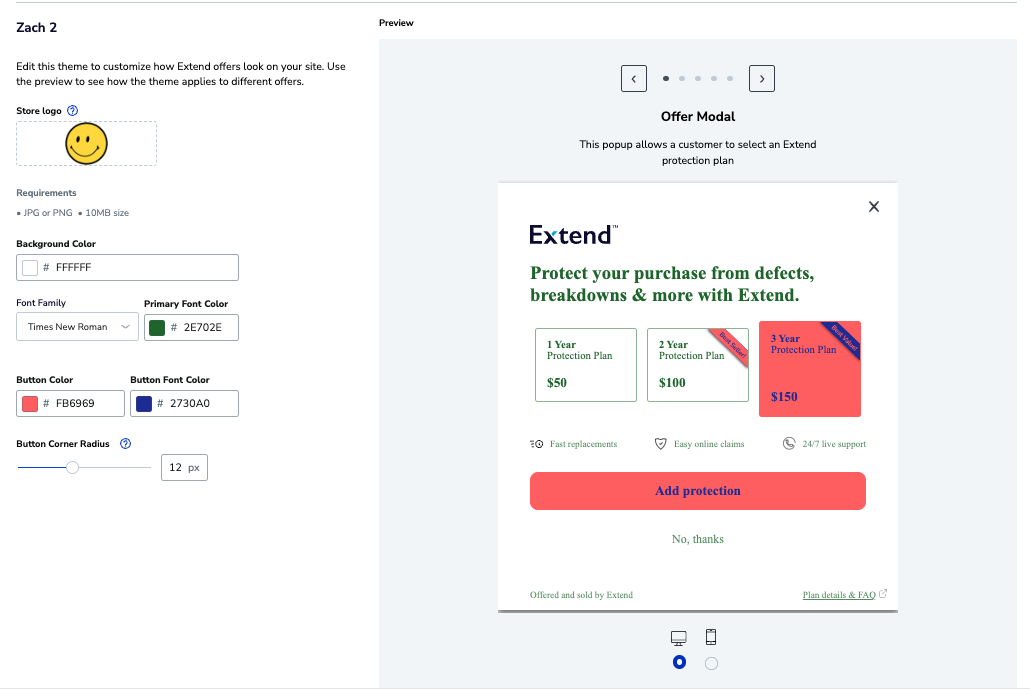
Below this dropdown menu on the left, are the inputs to change the customization values (logo, colors, font family, corner radius value). On the right is a “What You See Is What You Get” (WYSIWYG) preview display, where a user can see an example of what the various Extend integration elements look like with the selected inputs. Merchants can review how the combination of customization values appear on the Offer Modal, Learn More Modal, Product Page Offer, Cart Offer and Post-purchase Modal by either clicking on the arrows at the top of the WYSIWYG preview or the buttons between those arrows. Merchants are also able to toggle device type, to see how the same integration elements appear on a mobile or desktop device, by clicking on the radio buttons at the bottom of the preview display.
Manage Themes page

On this page is a table containing all existing themes for your store. For each theme, the merchant can see its name, creation date, last update date and status. To the far right of each row is a button with three dots. For the published theme, this button gives you the option to duplicate that theme; for unpublished themes that same button gives you the options to publish, delete, duplicate or rename that theme.
Above the table, in the upper right corner, is a button to create a new theme entirely.
Theme Management
Upon releasing this feature, the existing styling selections that Extend applied by default were saved as its own theme, aptly called “default theme.” This theme will include the logo and primary color saved in the merchant portal when this feature was released, alongside the default colors, fonts and corner radius value all of our merchants were assigned and using by default.
Merchants can create multiple themes, edit them as they please and publish the theme of their choosing. The next sections of this article will outline how to interact with themes in the following ways:
- Creation
- Modification
- Publishing
- Renaming/Deletion
Theme Creation
New themes can be created in a variety of ways: modifying the published theme, clicking the new theme button on the theme management page, duplicating a theme from the theme management page, duplicating a selected theme from the theme customization page and adding a new theme from the Selected Theme dropdown.
For any of these methods, a modal pop-up will appear for which to enter a unique name for that theme. That theme will remain a non-saved, draft theme until the “Save As New” button, in the upper right corner, is clicked; thereby saving the new theme as an unpublished theme. At this point the new theme can be modified, published or deleted.
Theme Modification
As mentioned earlier in this theme - this new feature allows for merchants to change various stylistic aspects of their Extend integration. Doing so is fairly intuitive. Here is some guidance on how to change those inputs
- To change the logo, click on the store logo currently uploaded and select a new one from your computer’s directory
- For best results, use a transparent PNG that's 175x60px or larger with no padding around the logo
- To change any of the color inputs, either paste/type in a new hex color code or select one from the dropdown color picker
- To change the font family, pick an option from the dropdown list
- To change the corner radius, either move the slider or enter a pixel value in the field
Be sure to save any changes you make once you are satisfied with the new settings.
Note: The merchant portal does not allow for the published theme to be modified. When changes are made to this theme, the merchant portal will prompt the user to save the changes as a new theme.
Theme Publishing
An unpublished theme can be published live either by clicking on the “Publish” button, found on the theme customization page, or through the theme management page, by selecting that action from the options available on the far right of the themes table.
PublishingOnly one theme may be published at a time. The Published theme is the theme that will be displayed on the website. Publishing a theme will automatically unpublish any other theme that is currently published.
Theme Renaming and Deletion
Unpublished themes can be renamed or deleted in one of two ways: through the theme customization page and through the theme management page.
Published themes cannot be renamed or deleted.
Updated 4 months ago