Search, Filter, and Sort the Leads
Overview
In this section we will walk you through how to use the Search, Filter and Sort options available for your Leads in the Merchant Portal. Once you find the lead you are searching for we will go into how to view details around that specific Lead
NoteYou will only be able to search for leads after your first lead has been generated. If you wish to manually create a test product on your store and walk through the checkout process skipping the Product Protection warranty this will generate an example lead you can utilize for testing.
WarningYou can search and filter on up to 100,000 leads total in the Merchant Portal. If you have more than 100,000 leads total, reach out to our team via the Merchant Portal for more information. You can filter down to at max 10,000 leads at once.
Search by Customer Email, Transaction ID, or Product Reference ID
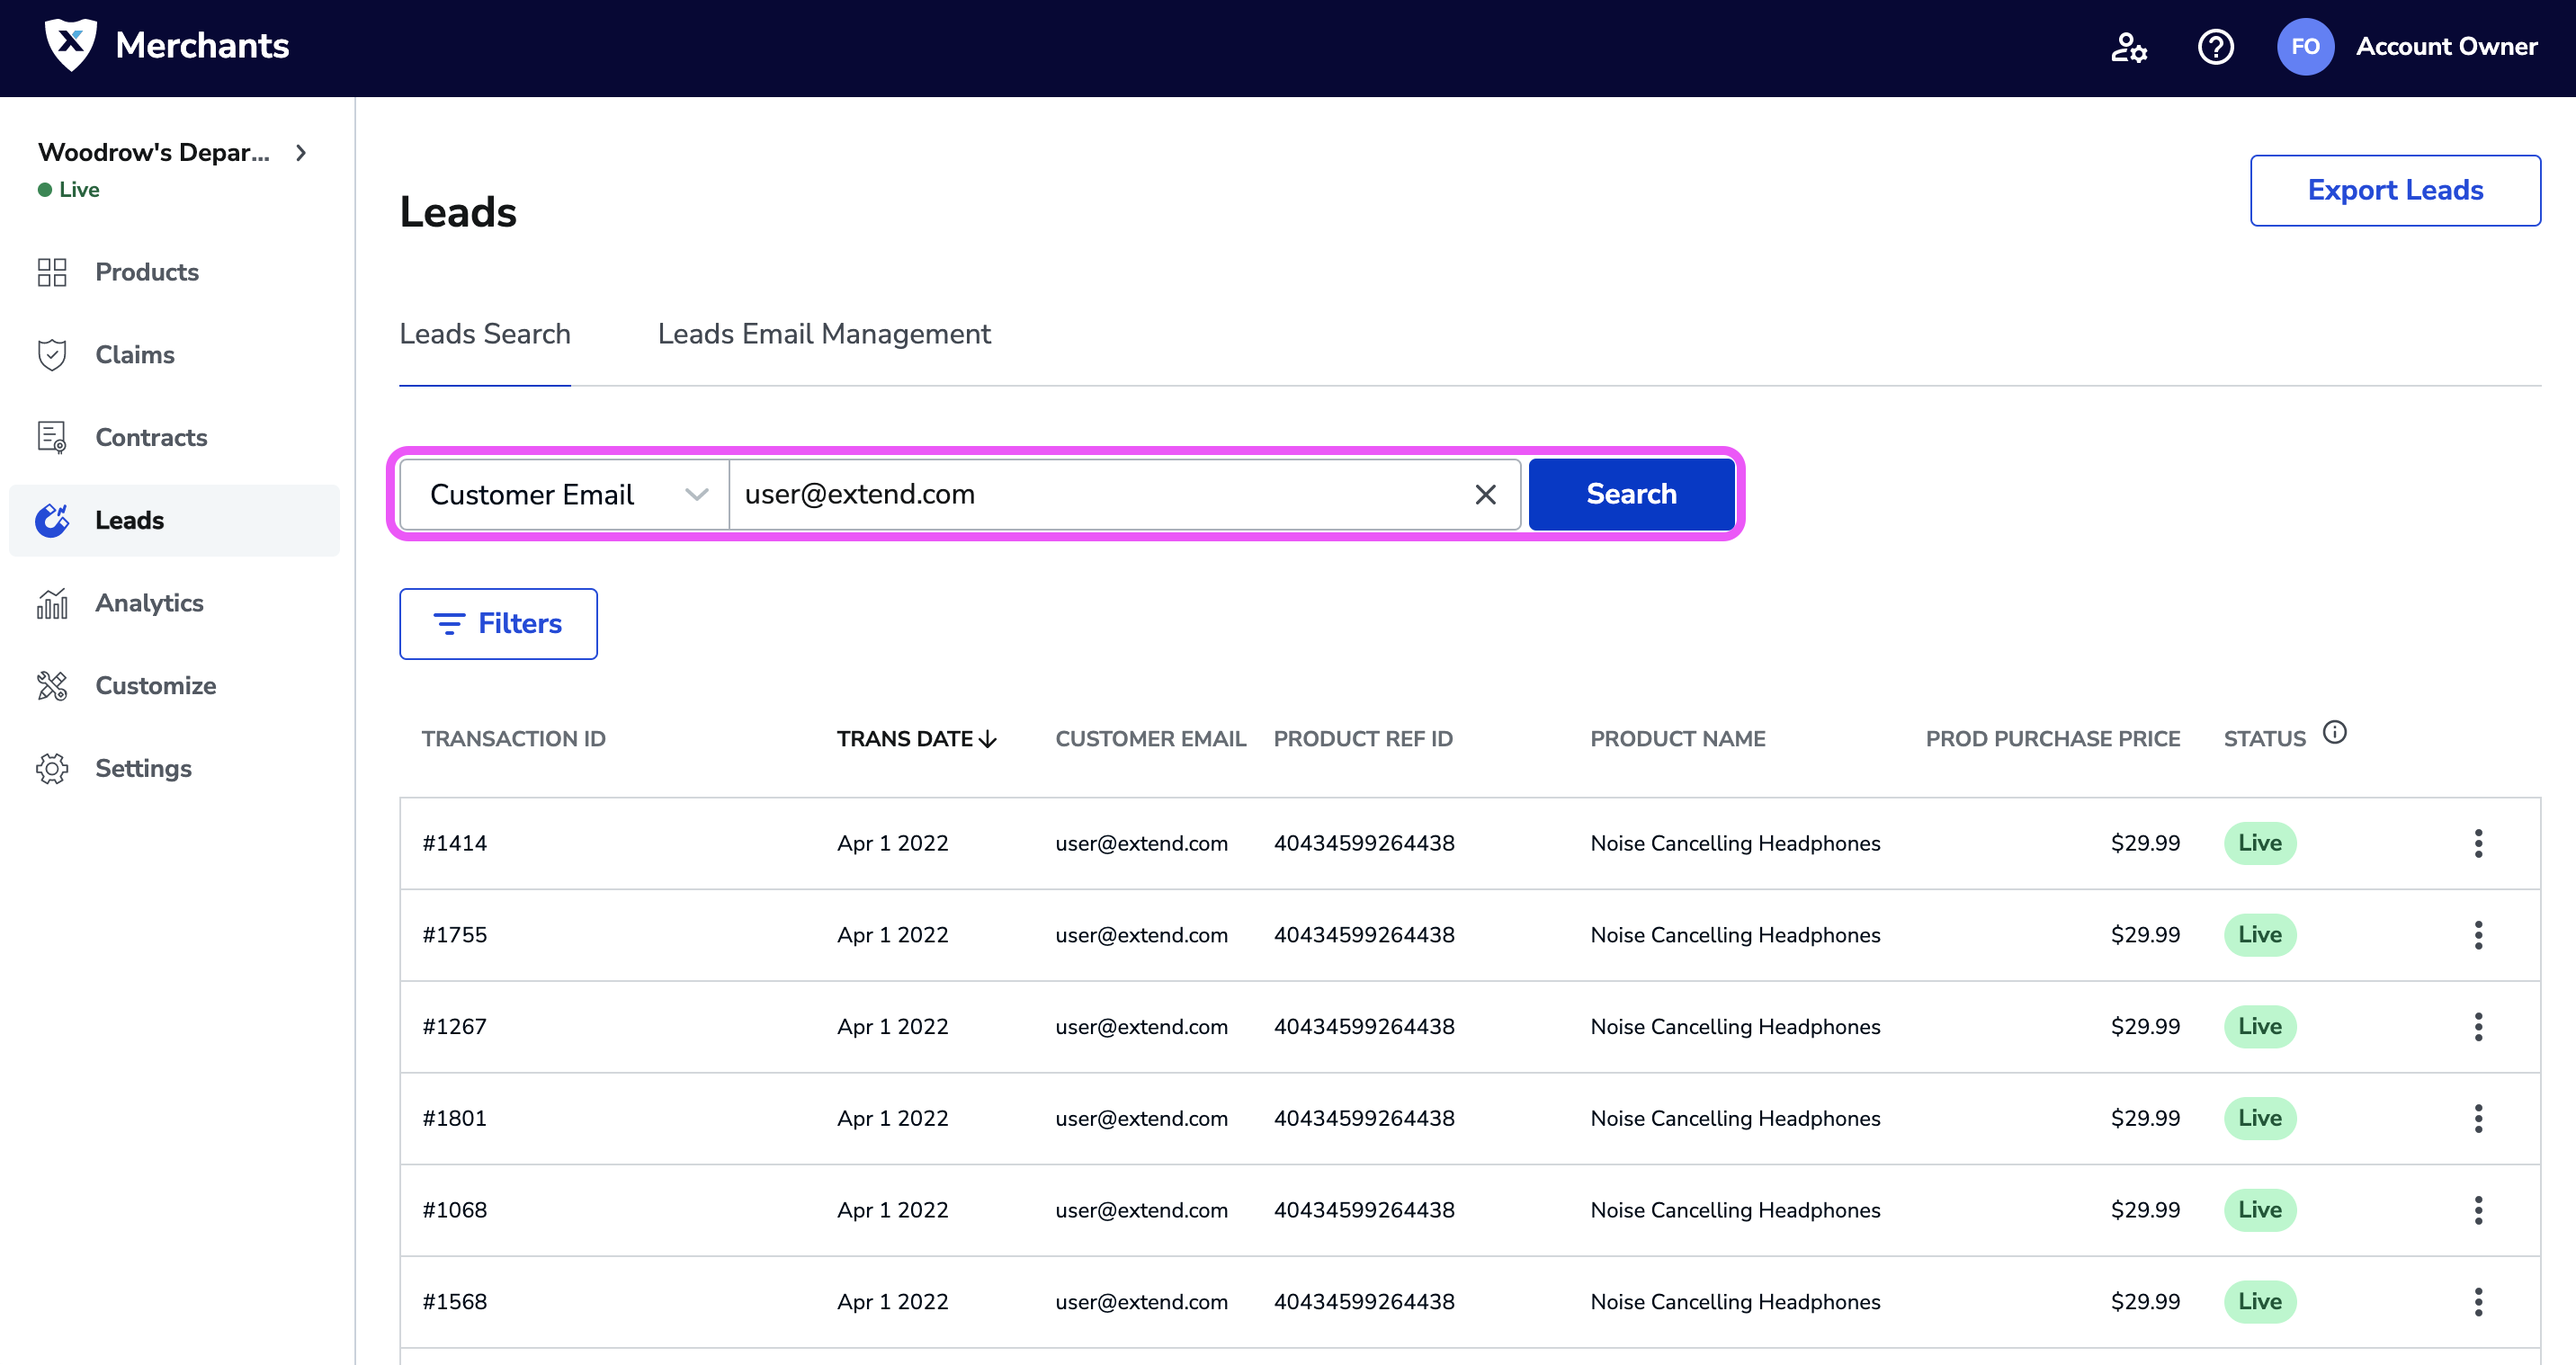
You can use the search bar at the top of the Leads List View to search your leads by Customer Email, Transaction ID, or Product Reference ID.
- Log into the Merchant Portal.
- On the left navigation bar, click on Leads.
- Select the parameter you want to search by using the search dropdown (Customer Email by default)
- Click the Search button
NoteApplying a date range filter after submitting a search term will clear your search term and only display leads that meet the date range filter -- you can either use a search term or date range filter, but not both together.
Sort your Leads List
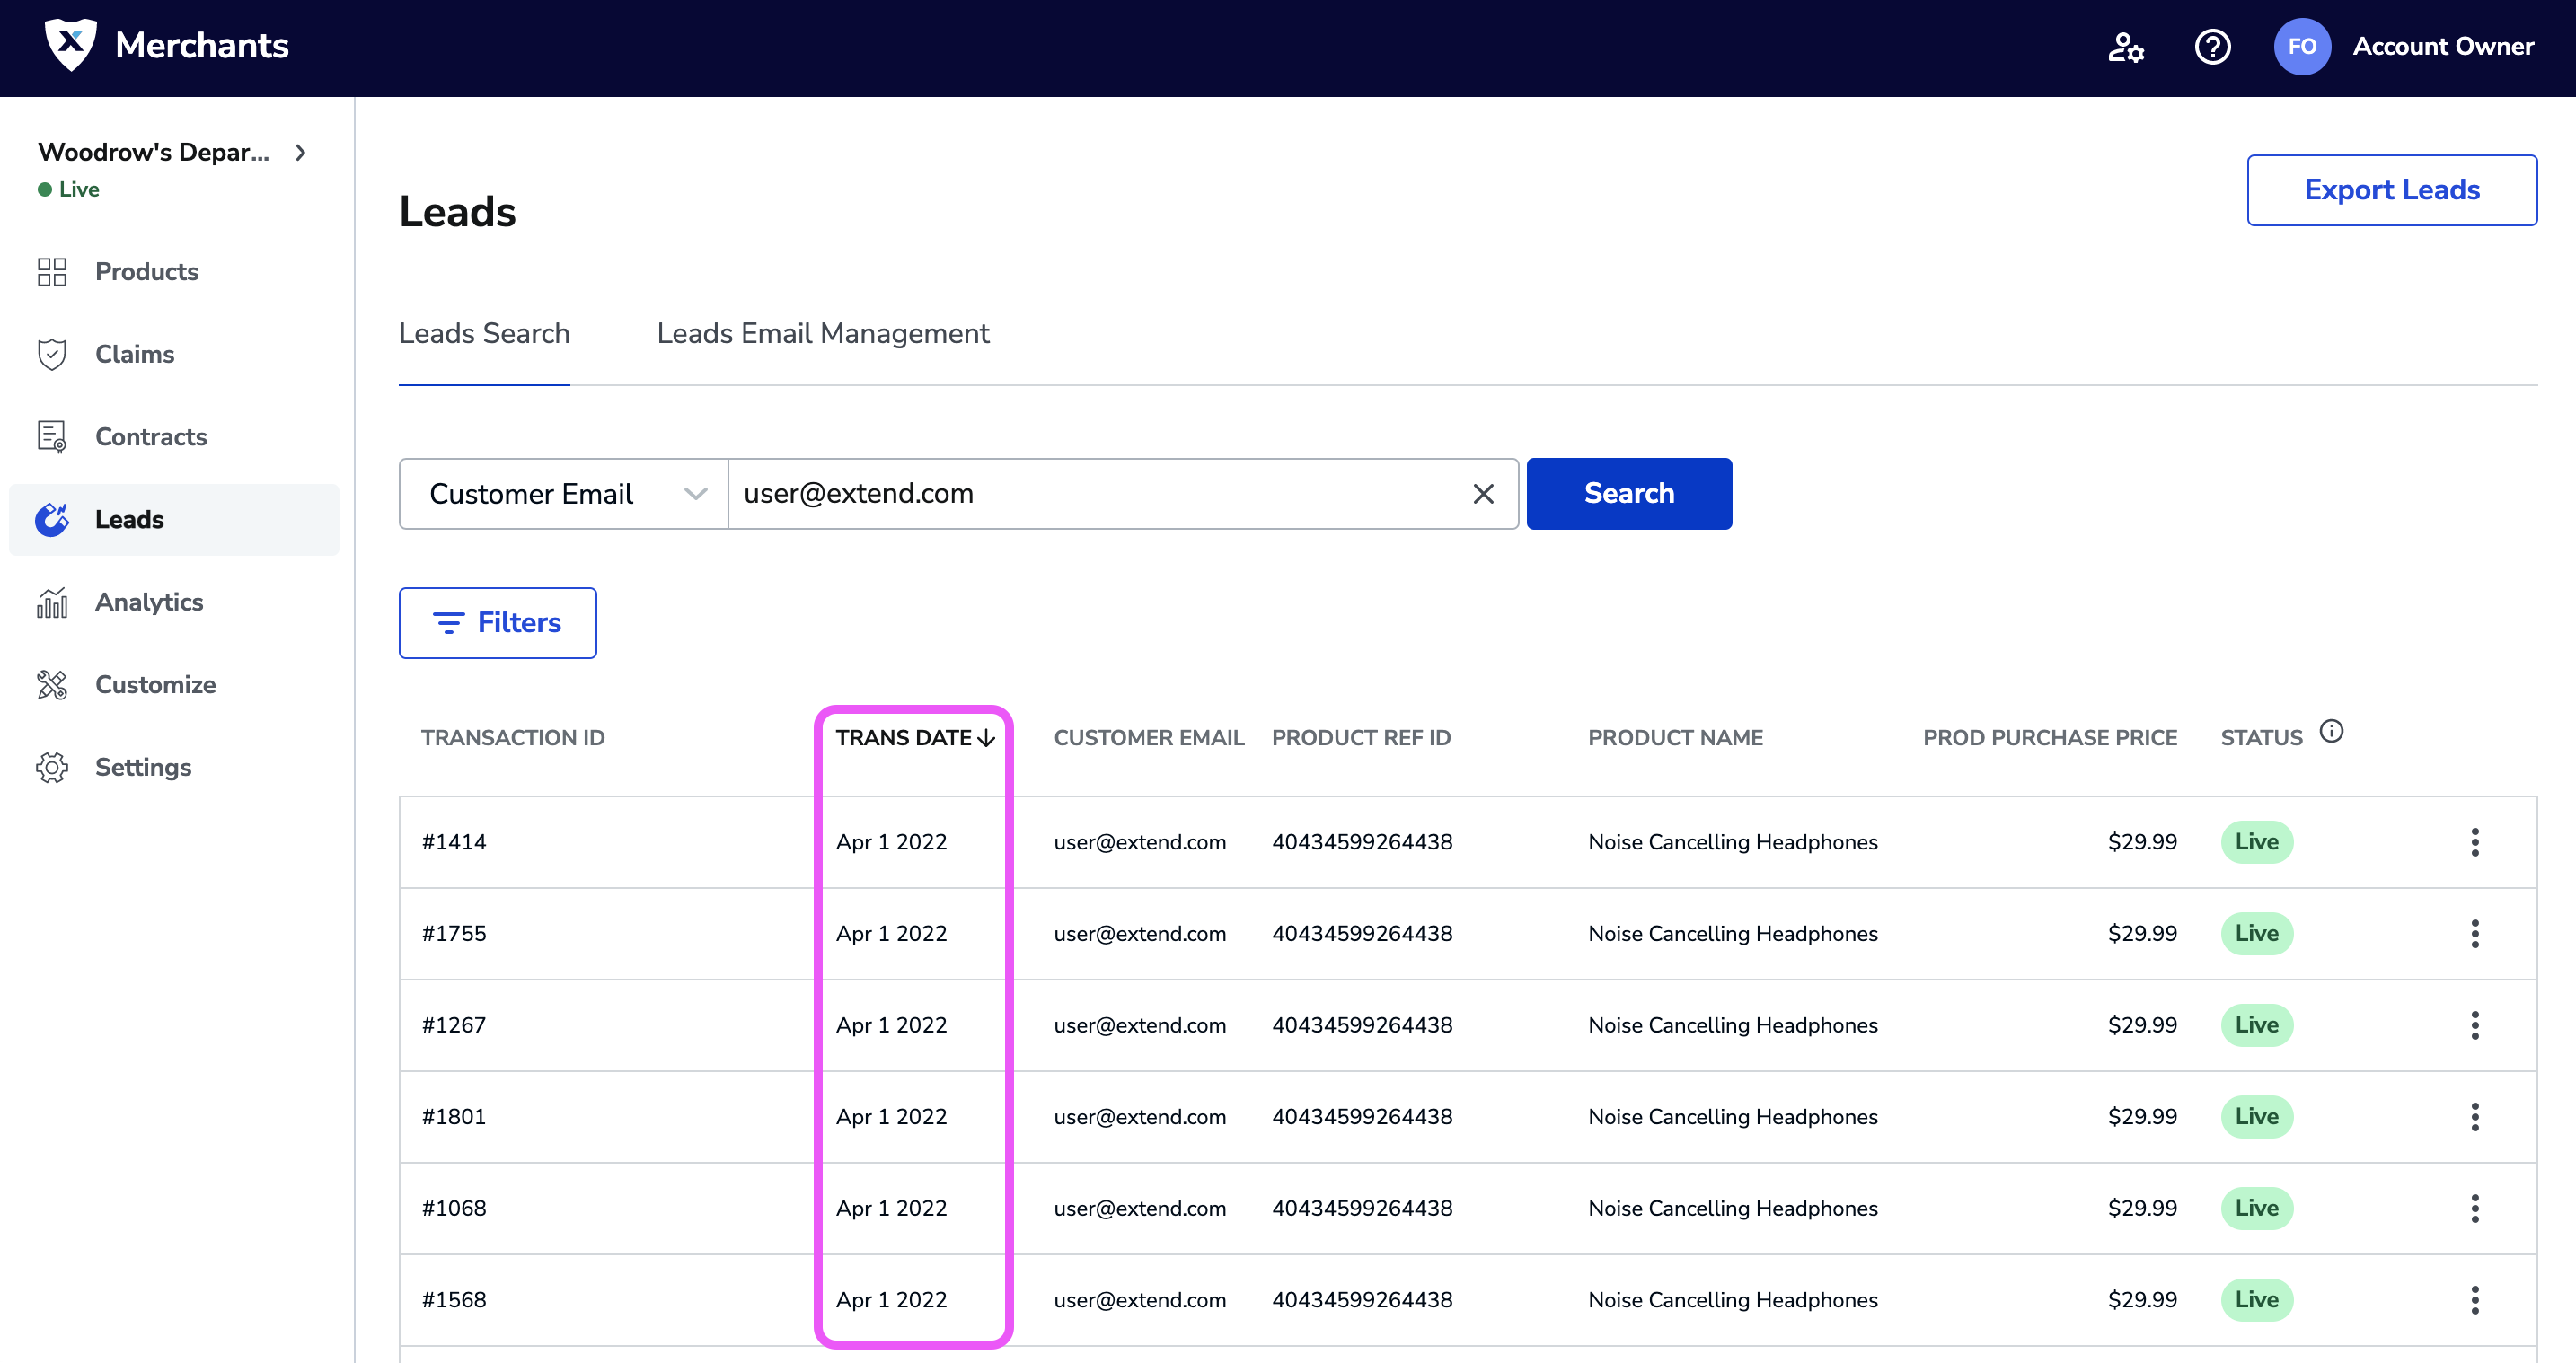
You can sort your entire list of leads on Date (default). This is the date that the lead was created.
- Click on the column title DATE to switch between ascending/descending order
NoteYour leads list can only be sorted after you have performed a search or applied a date range filter.
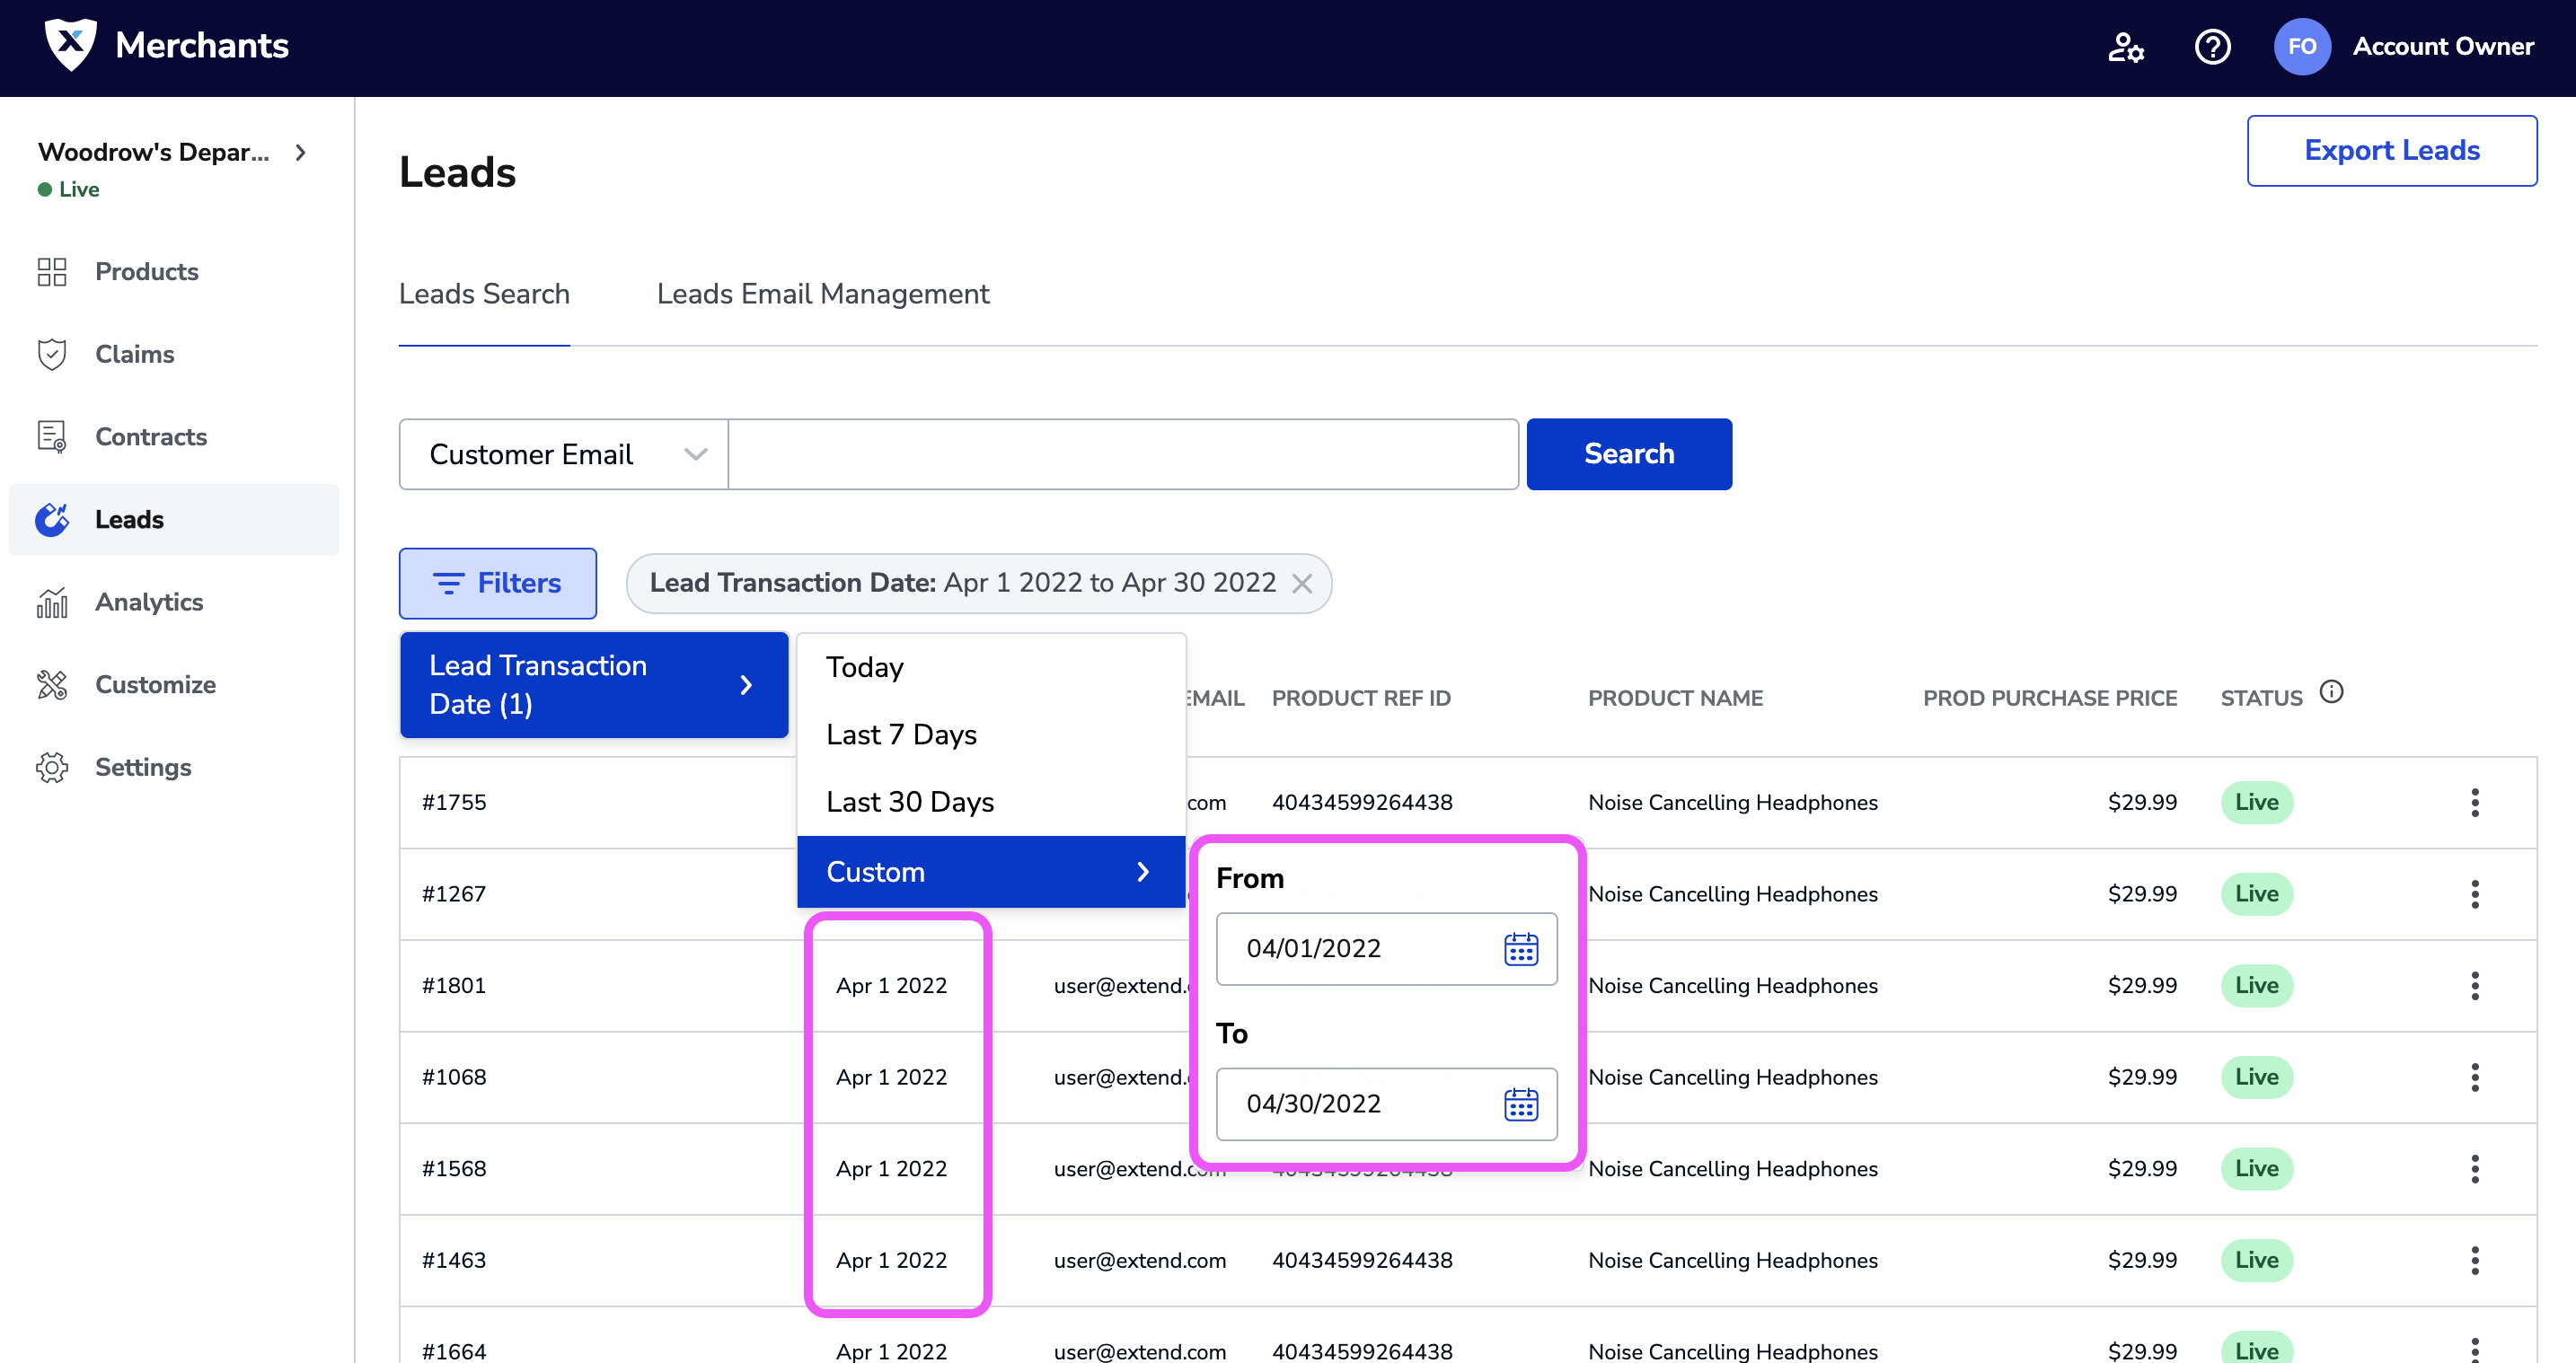
Apply Filters
You can apply a date range filter on the Leads List View to view leads that were generated within a specific date range.
NoteSubmitting a search term after applying a date range filter will clear your date range filter and only display leads that meet the search criteria -- you can either use a search term or date range filter, but not both together.
View Lead Details
You can use the Merchant Portal to drill into any of your leads and view information about the customer, product, status and more.
- Now that your have used the Search, Sort and Filter tools to locate your lead in quesiton Click on the lead in the list to view
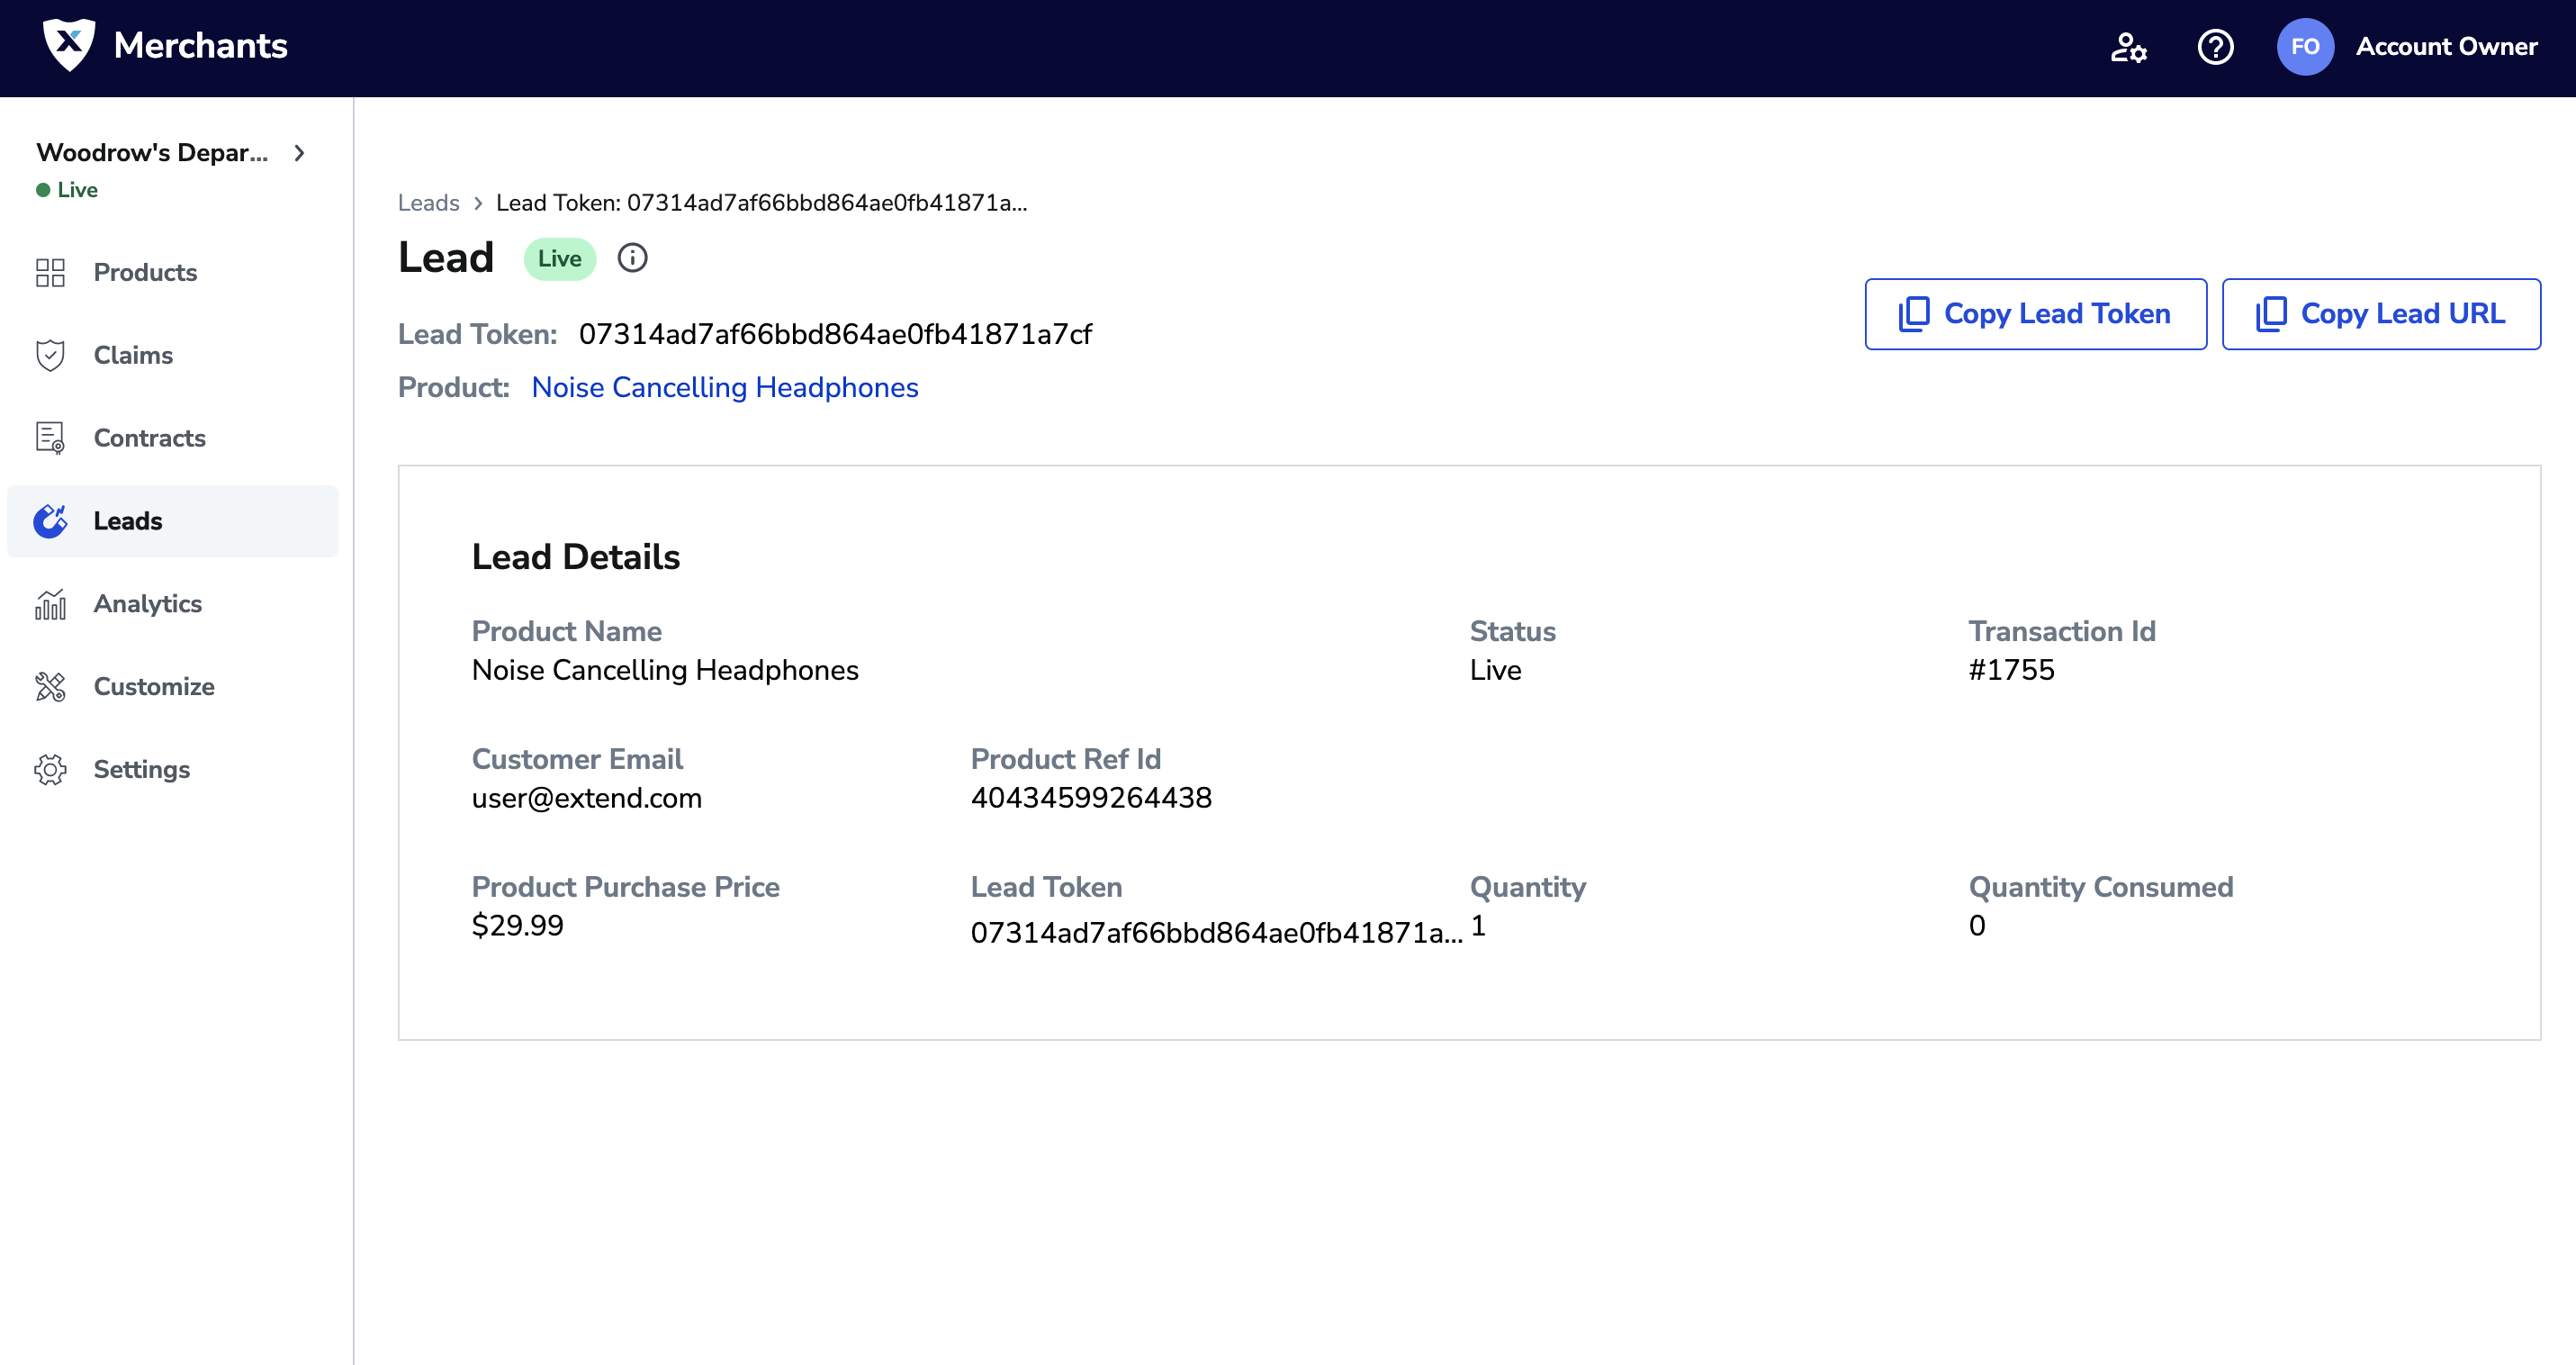
This provides a lot of info around the customer's purhcase including:
- Product Name - This was the name of the product as it was listed when purchased
- Lead Status - The lead status indicates whether this is still an actionable lead
- Transaction ID - This is the transaction ID as provided by your store at the time of purchase
- Customer's Email - The email address in relation to the customer who made the purchase
- Product Ref ID - This is the product ID or SKU
- Product Purchase Price - The price of the product at the time of purchase
- Lead Token - This token value is in reference to the lead and can be used if you need to provide a customer with a post-purchase warranty offer
- Quantiy Purchased - Number of products purchased
- Quantity Consumed - This indicated if the customer has clicked on a lead link in relation to this
Alright great job, you have learned how to Search, Sort and Filter your existing leads as well as how to view all the details around the lead.
In the next set of guides you can find more info around exporting lead lists as well as importing them into Excel or similar Spreadsheet tools. As well as info around Lead Tokens and their utilization.
If you run into any issues during this process or have questions please reach out to our team through your Merchant Portal.
Updated 4 months ago