CSS Selector
What is a CSS selector?
CSS selectors can allow you to locate a specific set of elements using JavaScript. They are called CSS selectors because they follow the same pattern that CSS uses to apply styles to one or more elements.
It is a set of characters contained within quotations that can be used to select an element on the page, as shown below:

an HTML selector for a quantity decrease button on a side cart using the class of an element
This selector will grab the element on the page that has the class “quantity-selector_button”.
Finding an element
We will cover 2 methods for finding an HTML selector:
Using the Inspector Tool
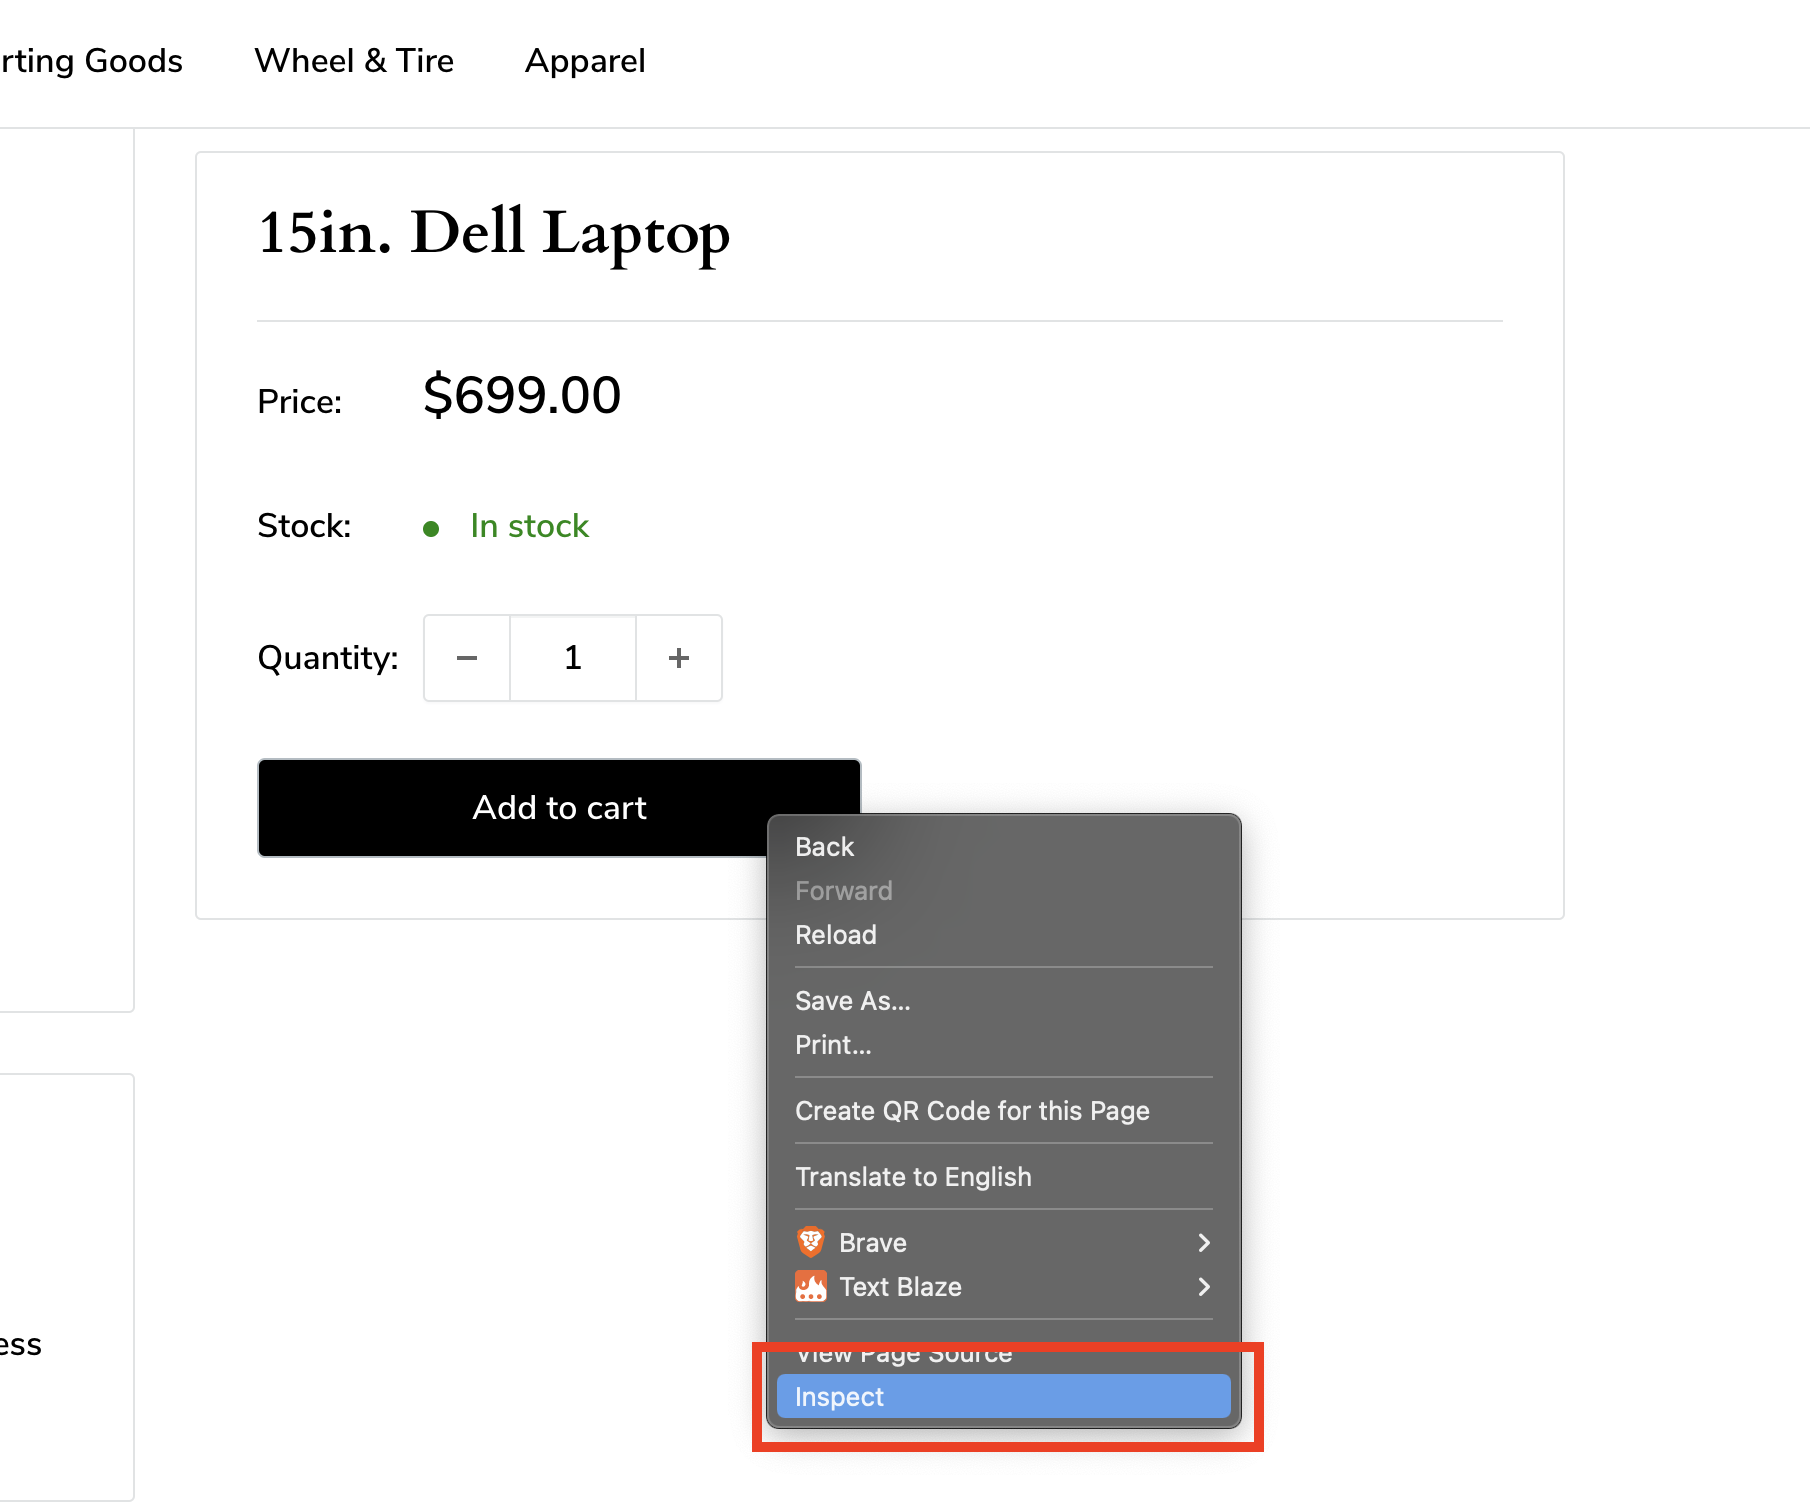
To see if this method is an option, simply find an element on the page, such as an Add To Cart button, and right-click on it. If there is an option that says “Inspect“ then you can use this method.
Clicking inspect should open the “Elements” tab in your browser’s “Development Tools” in your window, and have a section of text highlighted. The image below is the Chrome Developer Tools:
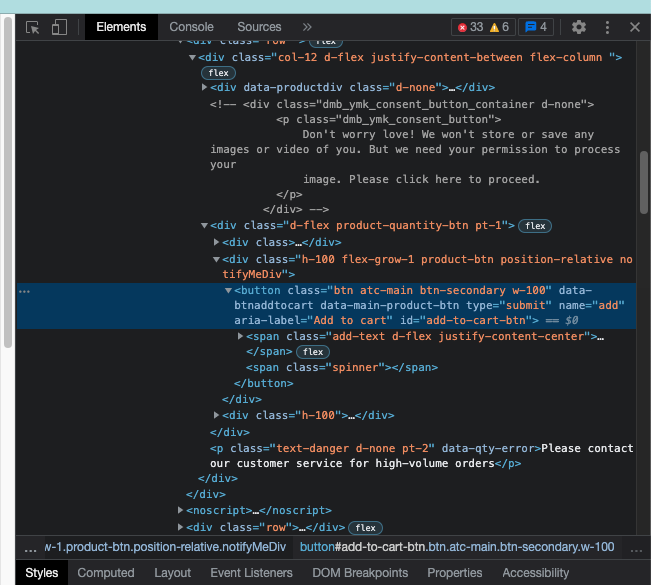
This highlighted section is the element you have selected.
Manually toggling the Developer Console
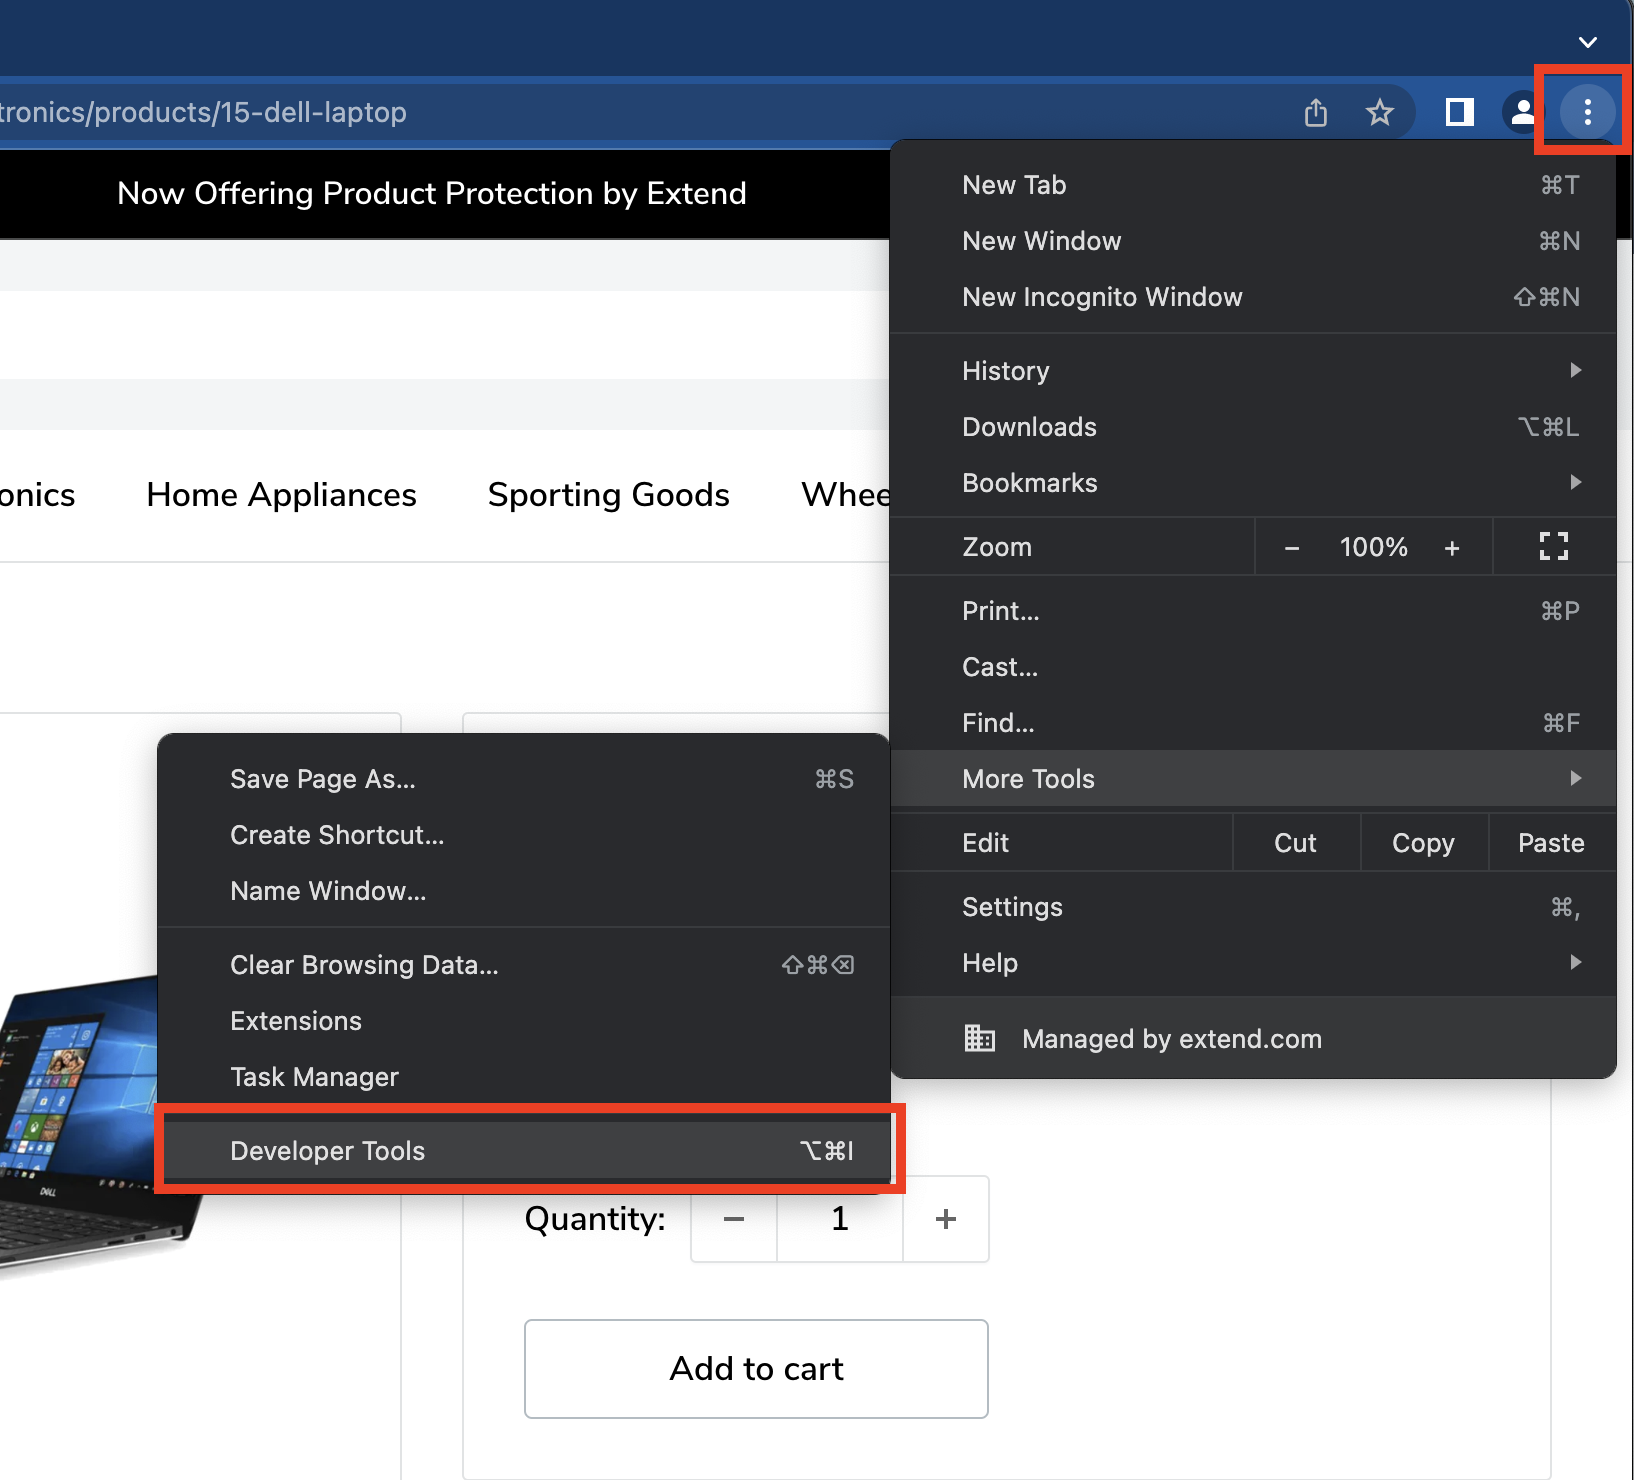
Another option to inspect an element on Google Chrome can be accessed by expanding the ellipsis (3 vertical dots) on the top right of your browser, then hovering over “more tools“ and then finally clicking on “developer tools“.
Getting the selector for your element
The key to selecting an element is being specific. This is because a selector may match more than one element on the page. If this happens, the first element occurring on the page matching that selector will be chosen.
The best solution (though not always an option) is to use an ID. other methods include class, attribute/value, and element tag name.
Not every element has each of these methods available to use so we will cover several options and even combinations of them
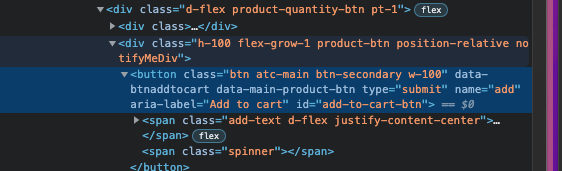
Let's take a look at different ways to select this Add To Cart button element:

ID
To use an ID selector, we want to start our string with a number sign symbol (#), followed by the text within the ID section. In this case, our selector will look like this:
“#add-to-cart-btn”
An ID is the safest selector to use if available because there should only ever be one element with a specific ID on the page.
Class
Using a class selector is very similar to an ID. Simply start the string with a period symbol (.) followed by a part of the class section. If classes contain groups of characters with whitespace between them, these are separate classes.
Using the example element above, let's grab the 'atc-main' class since it sounds specific to our element:
“.atc-main“
If we wanted to use more than one of its classes we would put them together using more periods.
Here we will grab it using the first 3 classes:
“.btn.atc-main.btn-secondary“
Attribute/Value
Visually this can be the most confusing selector to use, but it can be very useful when classes or IDs are not available.

In our example element above:
- An attribute is any of the text in light blue. Attributes do not always have a value.
- An attributes value is orange and contained after an “=“ for an attribute.
We can either use just an attribute, like this:
“[name]“
or use the attribute/value combination to be more specific:
“[name='add']“
Tag Name
This is the simplest selector to use, but it is also the least specific. We would typically only use this in combination with other selectors like class and attribute. The tag name is the first word shown in our selected element, after the “<“ symbol. Simply put the tag name of the element in quotations. For our example element above, it is a button-type element:
“button“
If necessary, we can even combine these selectors to be even more specific. For example…
“button#add-to-cart-btn.atc-main[name='add']”
While rarely necessary, you can combine all 4 methods as shown above.
This uses the structure “elementName > #id > .class >[attribute='value']“ to create a very specific selector.
Nesting from parent elements
A parent element is an element in which our target element is contained. This is distinguishable in the console by the spacing of elements. An element contained in another element is spaced further than the element above.

Using the above example, we can see that the DIV with a class of “.product-btn“ is a parent of our selected element. We can use this relationship to “nest“ down to our target with selectors to be more specific about which element we want to grab. this can be done by simply using whitespace.
“div.product-btn button.atc-main“
We can even nest multiple times if needed. If we go further up the parent elements, we can see that the DIV with a class of “.product-quantity-btn“ is the next parent up. Lets nest down into our button using 2 parent elements for more specificity:
“div.product-quantity-btn div.product-btn button.atc-main“
We can combine parent nesting with different selectors to grab any element needed.
Conclusion
Using this example, a good selector would be:
“button #add-to-cart-btn“
However, if we did not have an ID to use, we could use something like this:
“button.atc-main[name='add']“
If there was also no class available, we would likely nest from a parent element:
“div.product-quantity-btn .product-btn button[name='add']”
Updated 3 months ago